Keeping up with social media and keeping your online community engaged can be a time consuming task. Through Bot Libre you can now automate your Facebook presence with your own Facebook Messenger bot. Any Bot Libre bot can be connected to a Facebook Messenger page account. The bot will reply to your users questions in real-time using the responses of script you have trained your bot with.
Connecting a bot to Facebook is a bit of a process, as Facebook requires a lot of permissions and validation to be setup to allow a bot on their platform. This "how to" give you a step by step process to connecting your bot to Facebook Messenger.
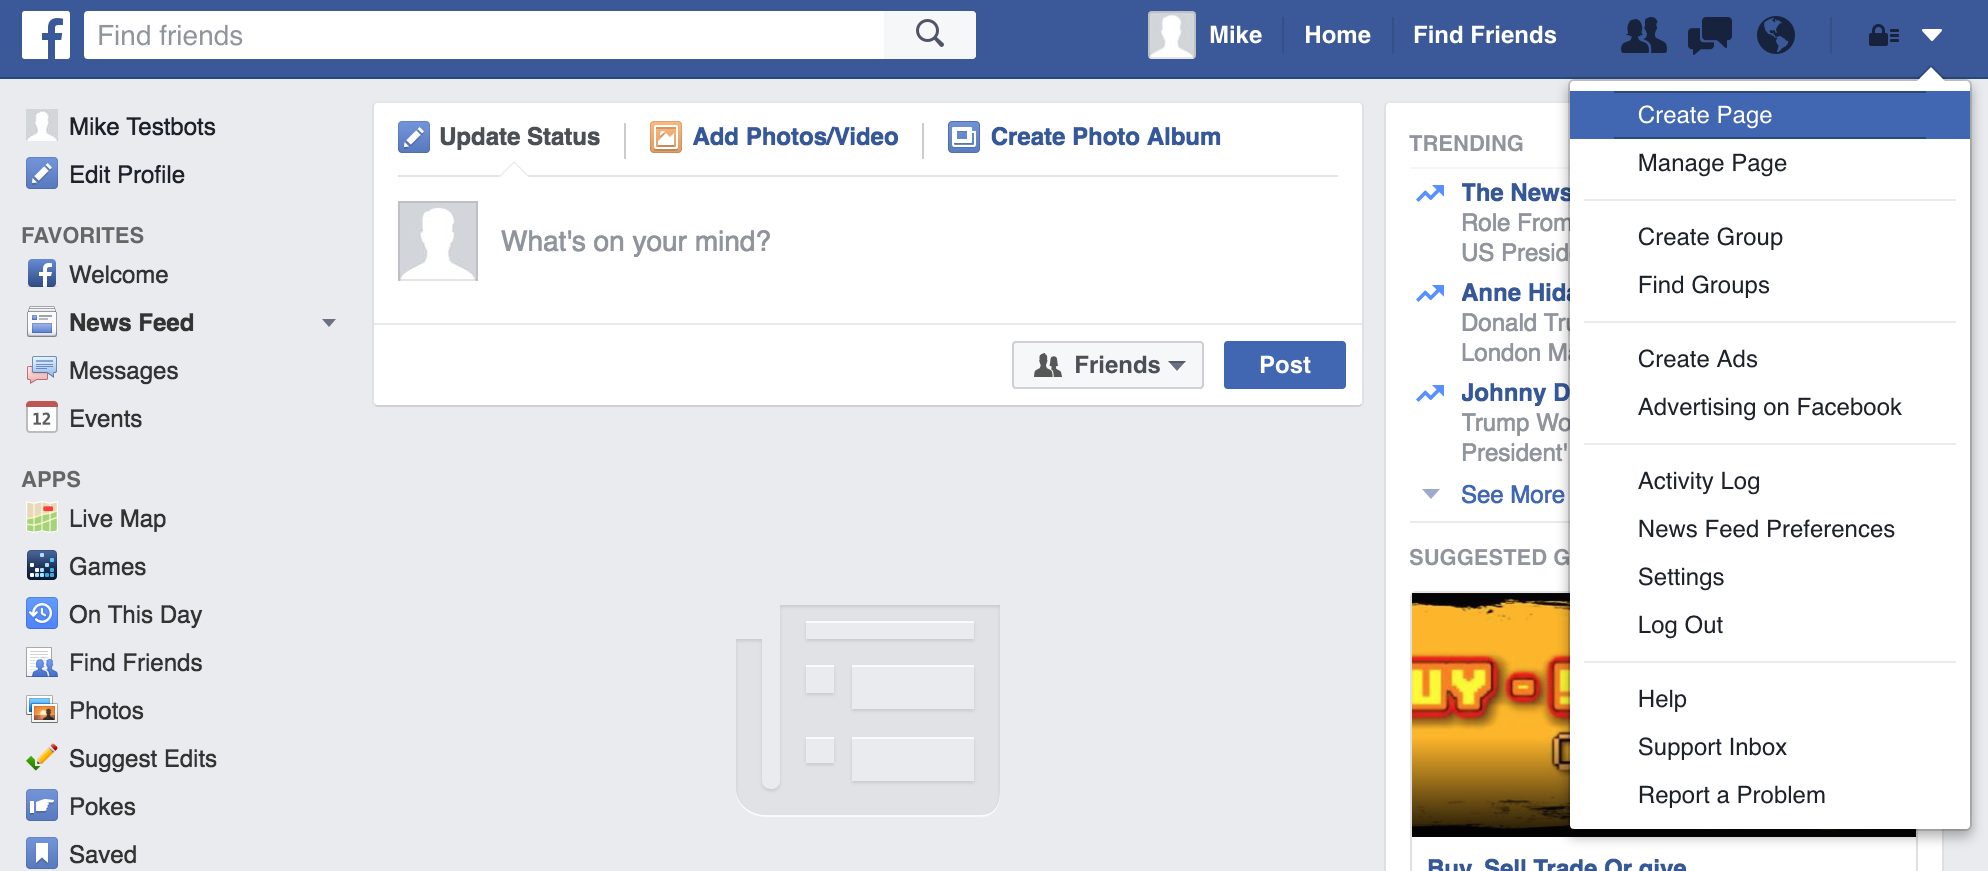
Step 1 - Create a Facebook Page for your bot.
After you have logged in to your Facebook account, you can create a page by clicking on the menu at the top-right of the page and clicking “Create Page”.
You must then select a category for your page. Choose a category that will make sense for your bot.

Fill out the details for your page to finish creating it.

Step 2 - Create a Facebook App for your bot.
Go to http://developers.facebook.com and click on the Register button. Accept the Facebook Platform Policy and Facebook Privacy Policy to continue.

You will need to verify your account by adding a phone number and entering a confirmation code sent to you by text message or phone call. You may also verify your account by adding a credit card.
On the following screen, select the "basic setup" option at the bottom.

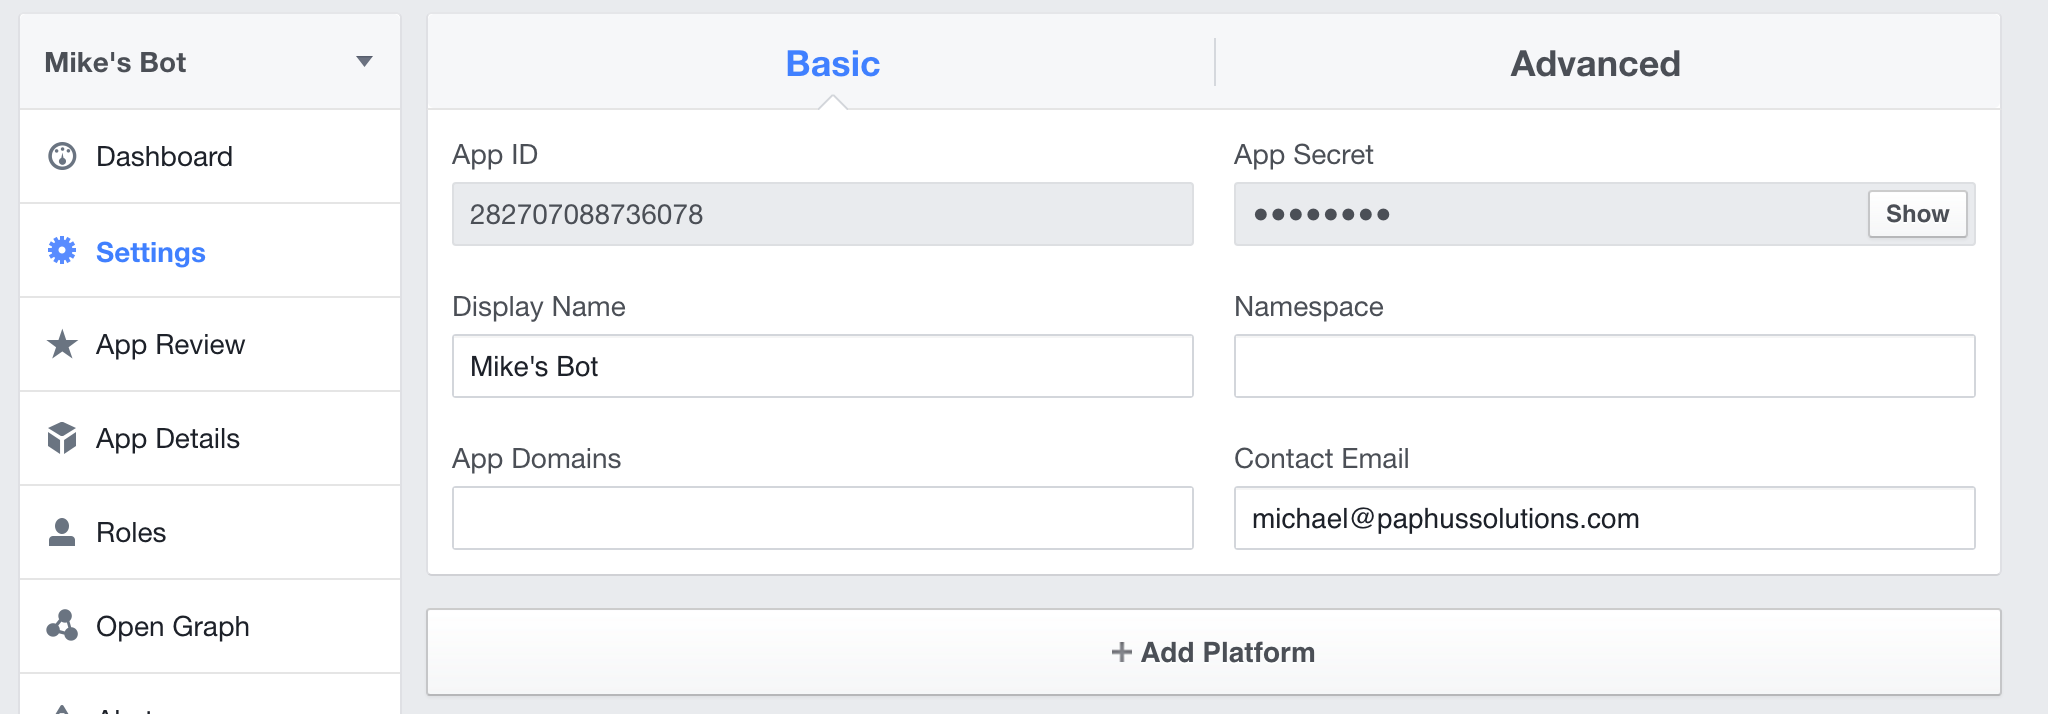
Next, you will have to enter a Display Name, Contact Email and Category for your app.

After you have entered the required details, click the "Create App ID" button. This will take you to the following screen.

Note your App ID and App Secret, you will need these in following steps.
Click on the "Settings" tab on the left hand side of the screen underneath "Dashboard" to bring you to the following screen.
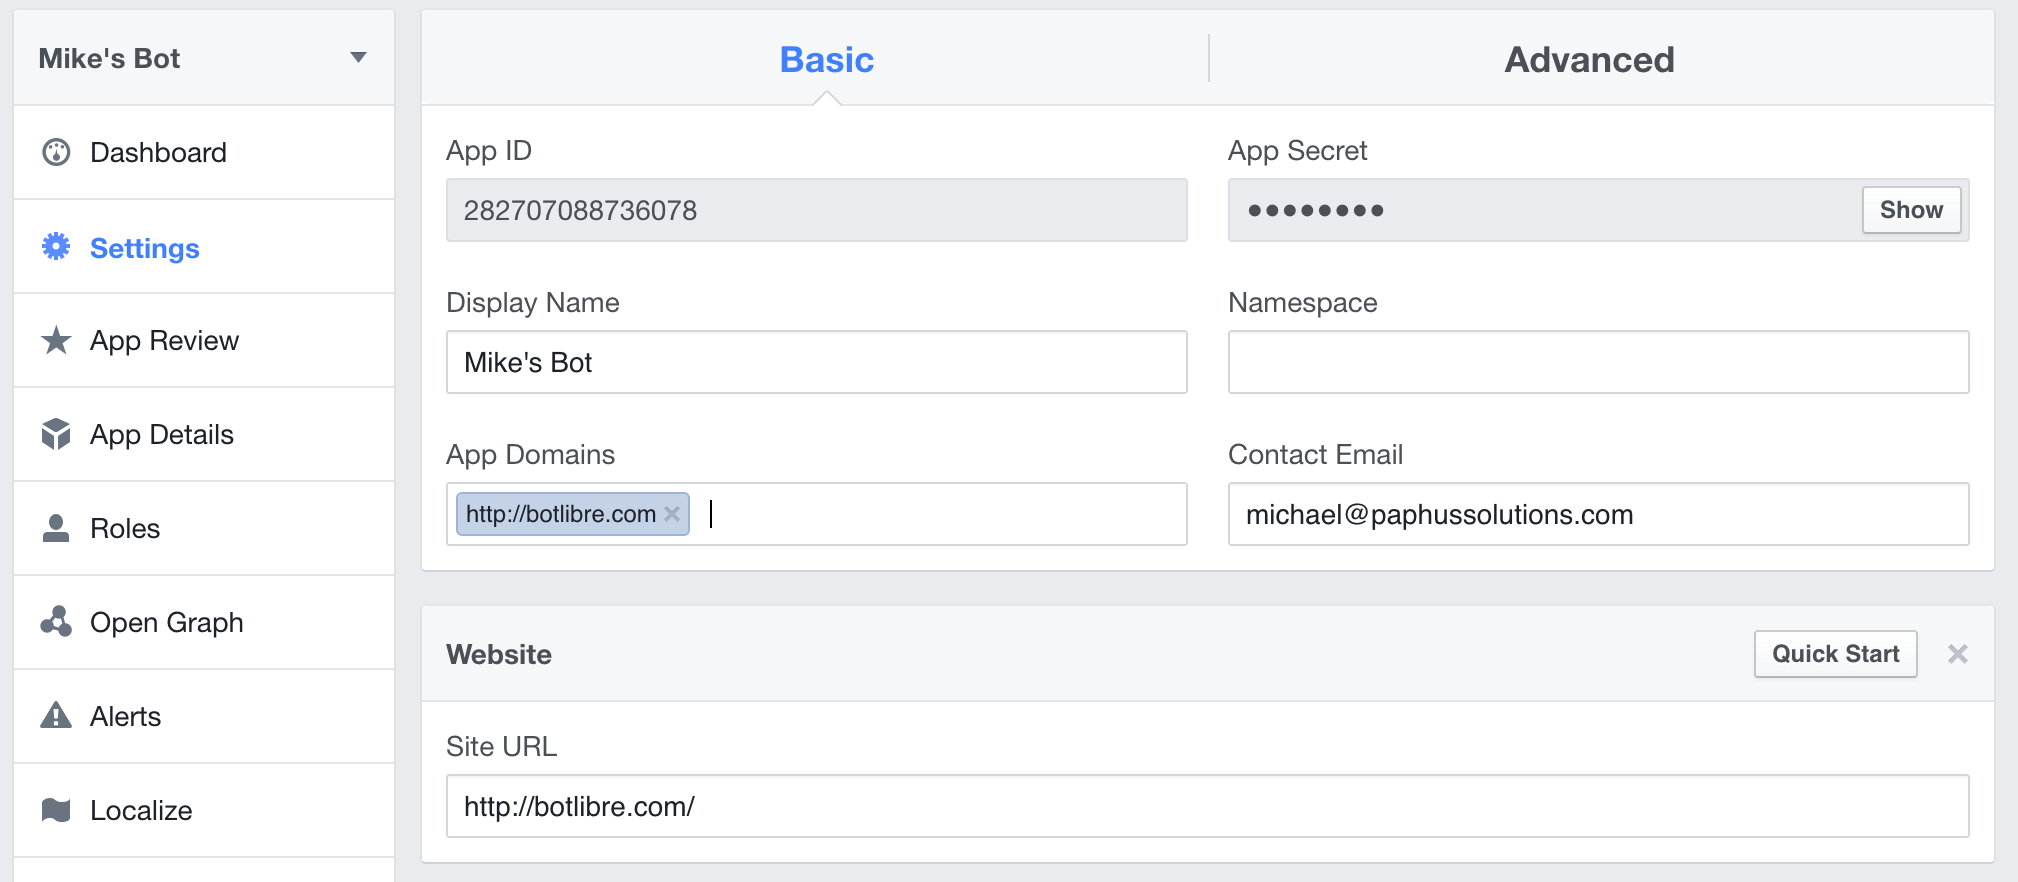
Click the "+ Add Platform" button at the bottom and select "Website". Fill in the Site URL with "http://botlibre.com", then add "http://botlibre.com" to App Domains as follows.
Step 3 - Create a bot
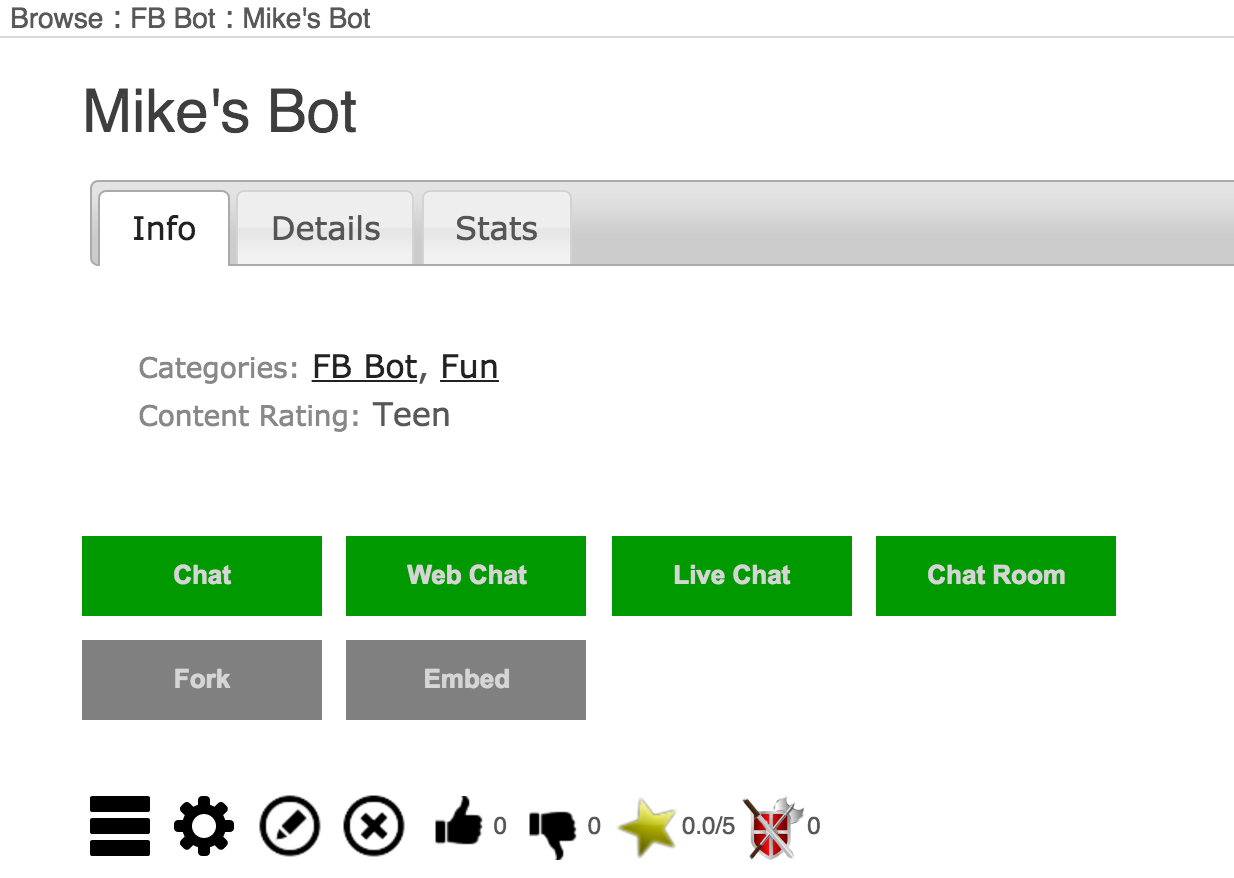
Next, you will need to create a bot to connect with your Facebook Page and App. You can follow the instructions here to create your bot: How to create your own chat bot in 10 clicks
Step 4 - Connect bot with Facebook
From the Bot Libre website, browse to your bot. Go to the Admin Console by clicking on the gear icon at the bottom.
From the Admin Console, click on "Facebook" to take you to a screen to configure your Facebook settings. Click on the "Advanced" button to open up the following menu.
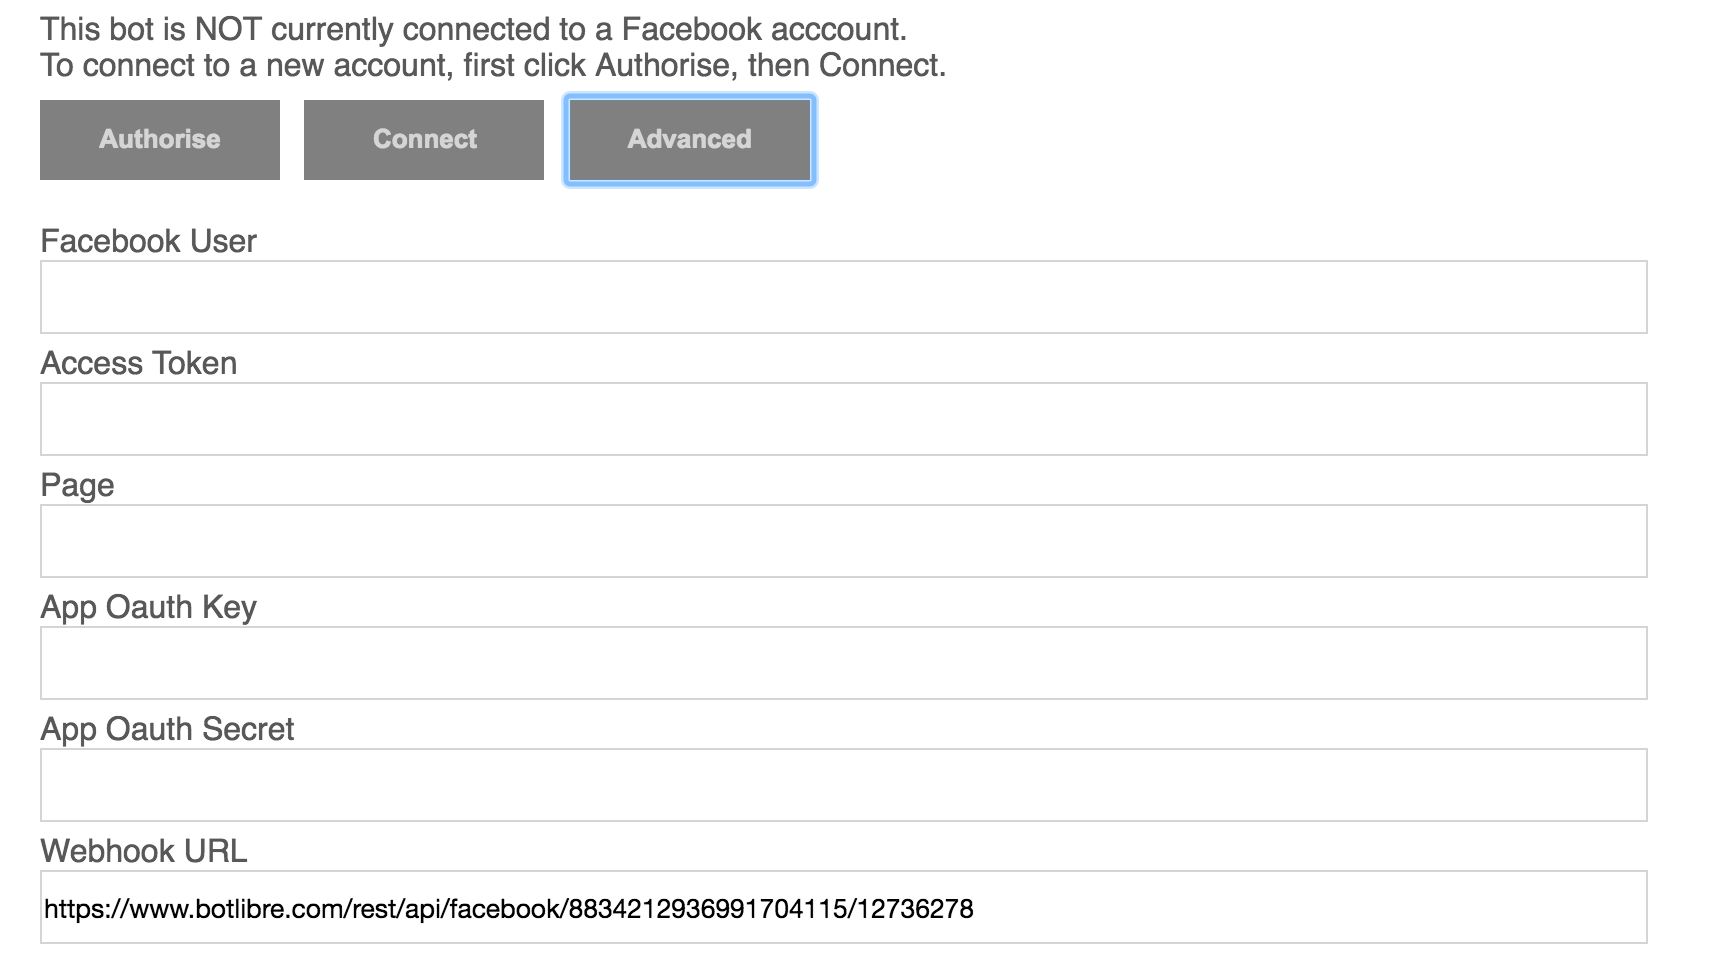
Enter the "App ID" and "App Secret" from your Facebook App into the corresponding fields on this form.
Next, click "Authorise" button to authorize your bot with Facebook. Click "Okay" to accept any permissions needed by Facebook.

The "Facebook User", "Access Token" and "Page" fields should now have been filled in automatically.
Click the "Connect" button to connect your bot to Facebook.
Now scroll down to "Facebook Bot Properties" and click "Facebook Messenger (realtime messages)" to toggle it on. Press save.

Copy the "Webhook URL" to your clipboard for use in the next step.
Step 5 - Set up Webhook URL with Facebook
Go to your Facebook App's dashboard webpage. Select "Webhooks" from the menu on the left.
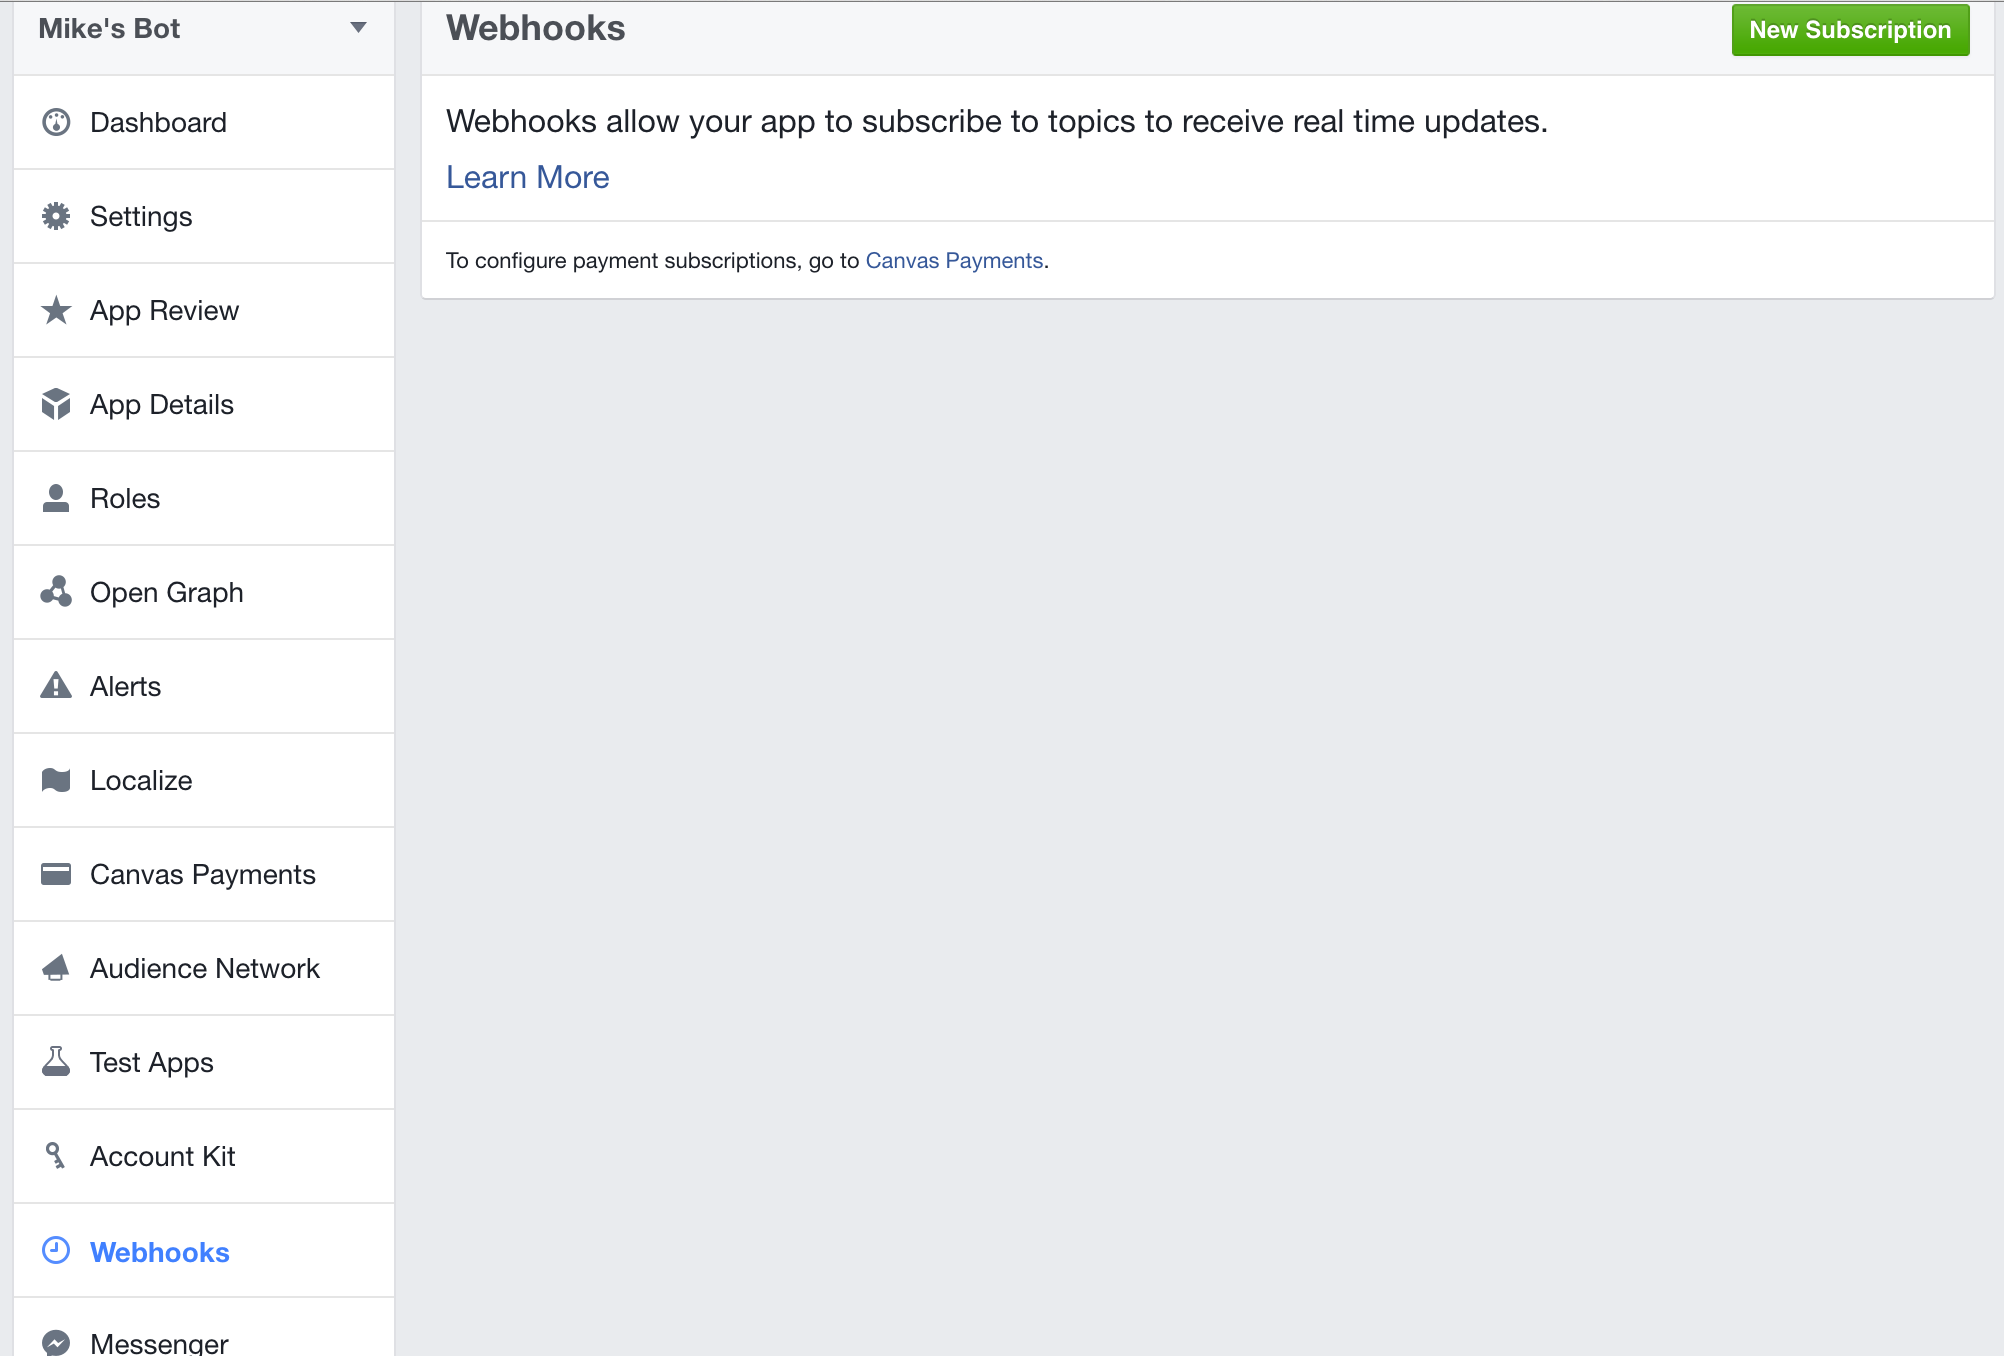
Click the "New Subscription" button on the top right and select "Page" from the popup to open up the following menu.
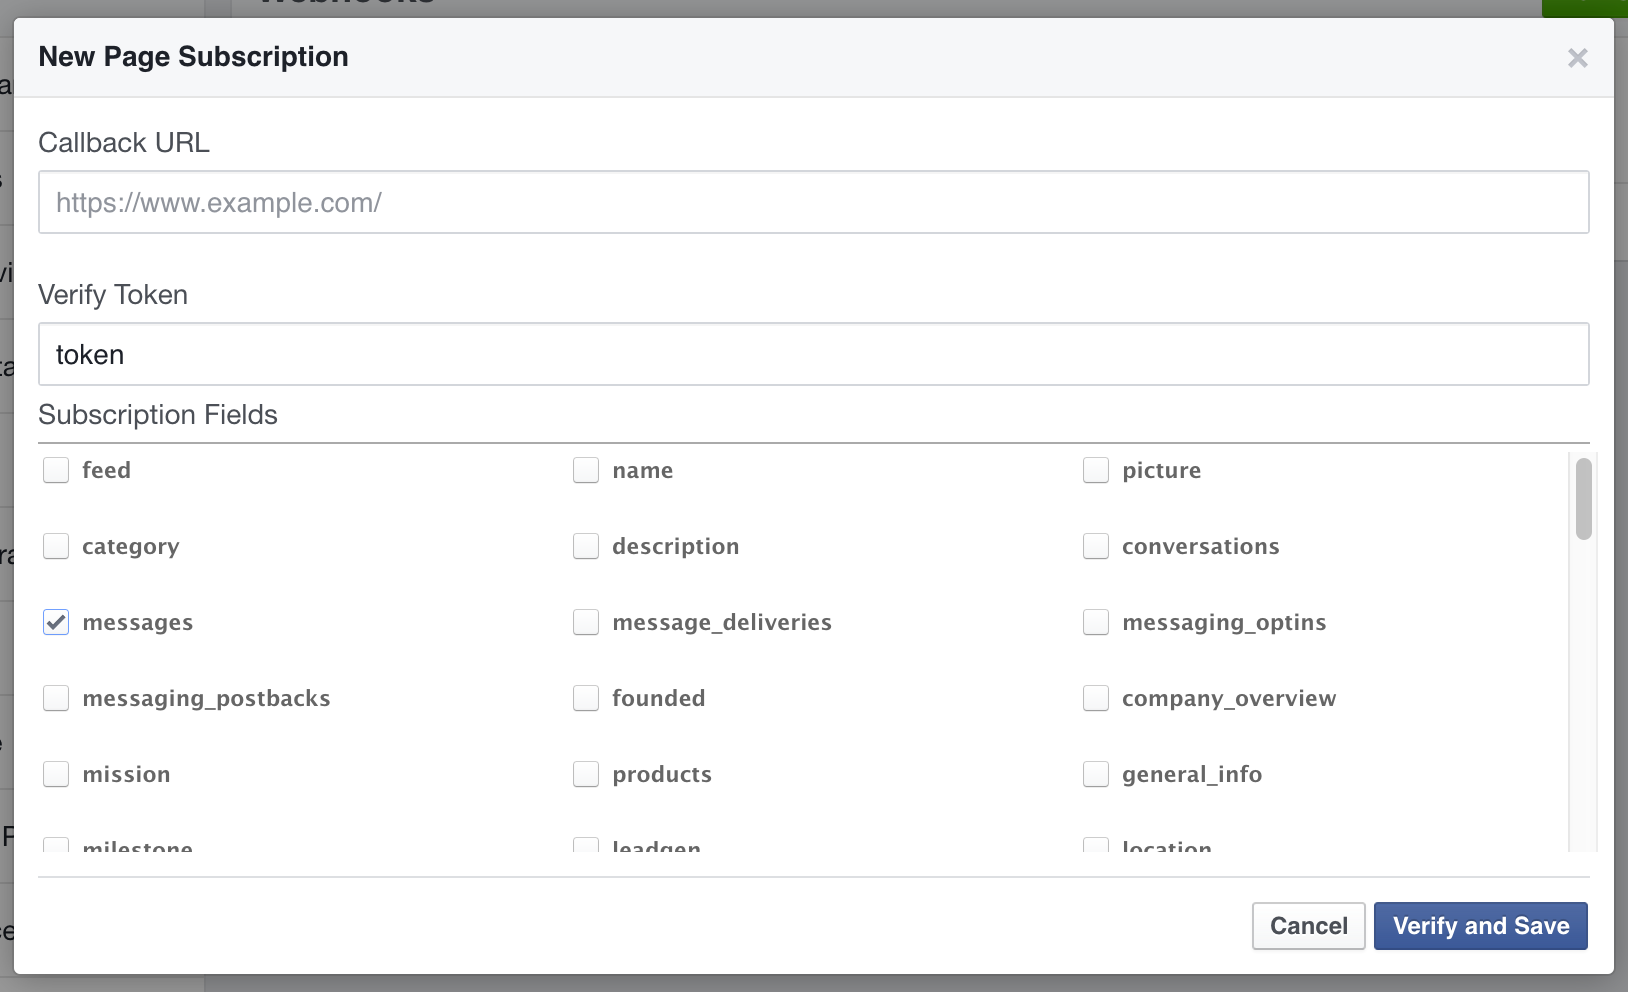
Enter the "Webhook URL" you had copied in the previous step into the "Callback URL" field. Enter "token" into the "Verify Token" field. Select only "messages" in the "Subscription Fields".
Click the "Verify and Save" button to finish.
Now select "Messenger" from the left menu, underneath "Webhooks" to see the following menu.

Under "Token Generation", click the "Select a Page" dropdown and select your bot's Facebook Page. Copy the generated "Page Access Token" to your clipboard.
Then, under "Webhooks", click the "Select a Page" dropdown and select your bot's Facebook Page. Click the "Subscribe" button that appears right beside it.
Now return to your bot's "Admin Console" on the Bot Libre website. Go to the "Facebook" tab and paste the "Page Access Token" you had previously copied into the "Facebook Messenger Page Access Token" field.
Press "Save".

Step 6 - Approval by Facebook
At this point, you should be able to send messages to your bot's Facebook Page with the Facebook user who created the page, and your bot will respond.
For other Facebook users to be able to send and receive messages with your bot, you will need to have your Facebook App approved by Facebook.
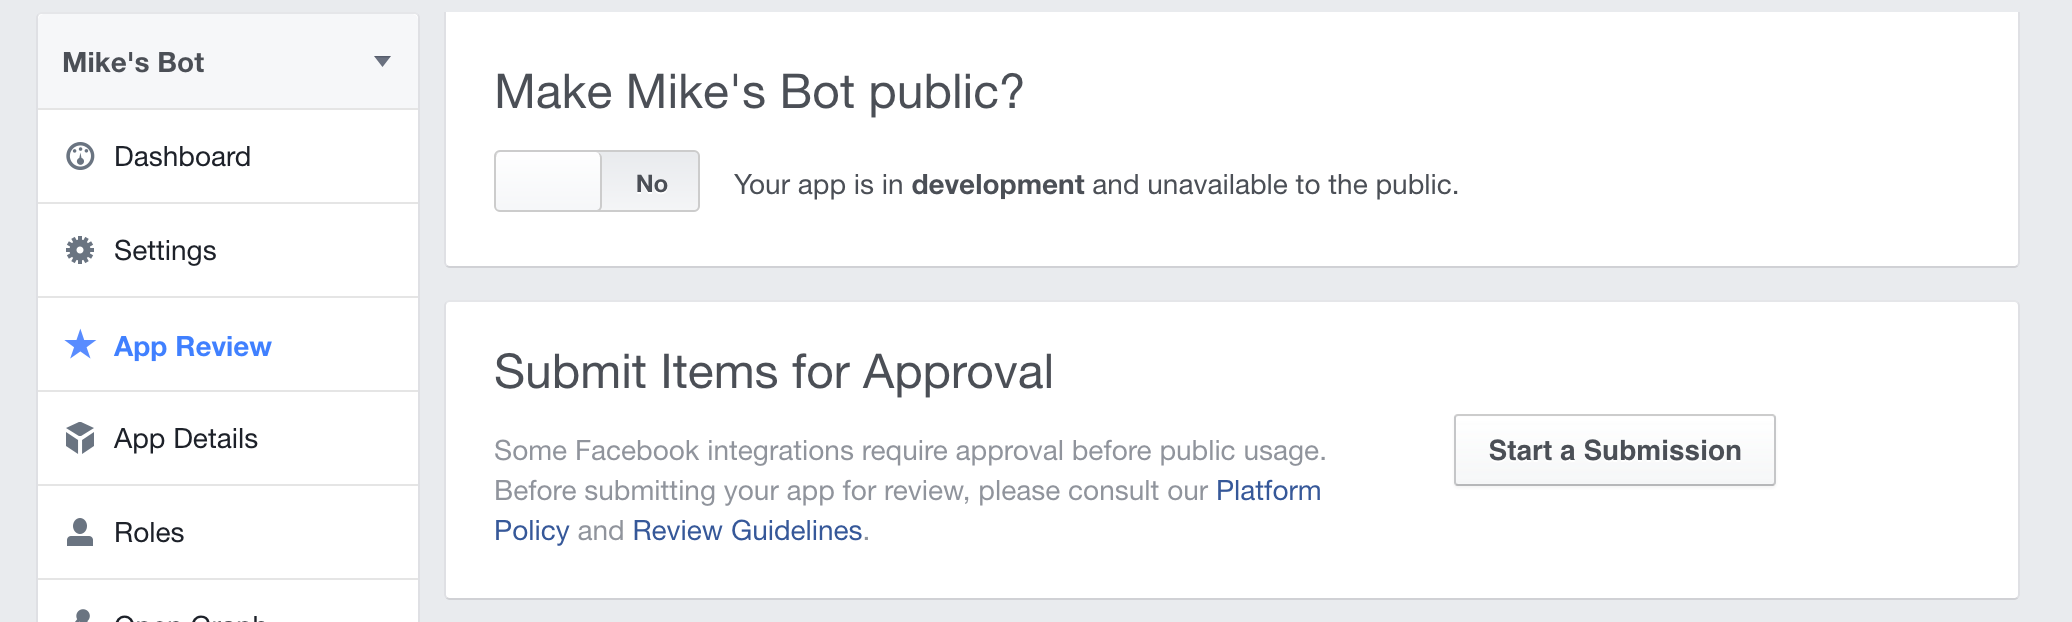
Click on the "App Review" tab on the left menu. Click the "Start a Submission" button.
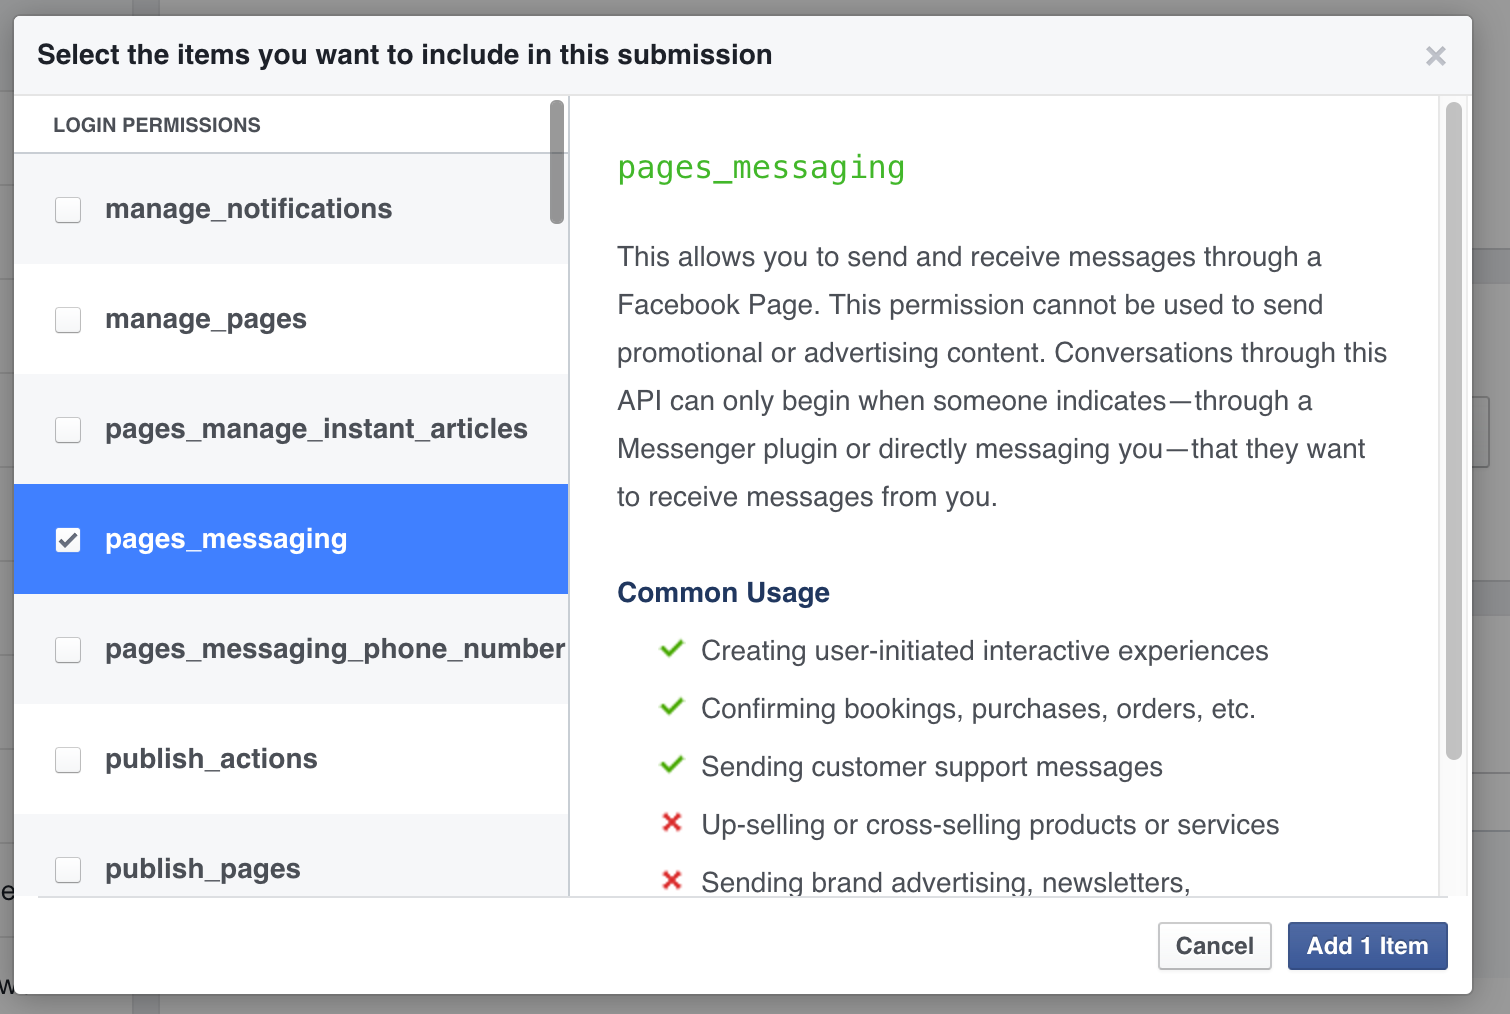
Select the "pages_messaging" login permission, then click the "Add 1 Item" button.
You may need to complete additional details in the "App Details" tab before you can complete your submission. You will need to upload an app logo and provide a URL to your privacy policy.
Next return to the "App Review" tab and click the underlined "notes" underneath "pages_messaging".

Complete the details in the following pop up. You will need to upload a video of you chatting with your bot on Facebook at this step. You can record this with software such as CamStudio or Quicktime.

When you have completed all required details, click the "Submit For Review" button.
After some time, Facebook should approve your App.
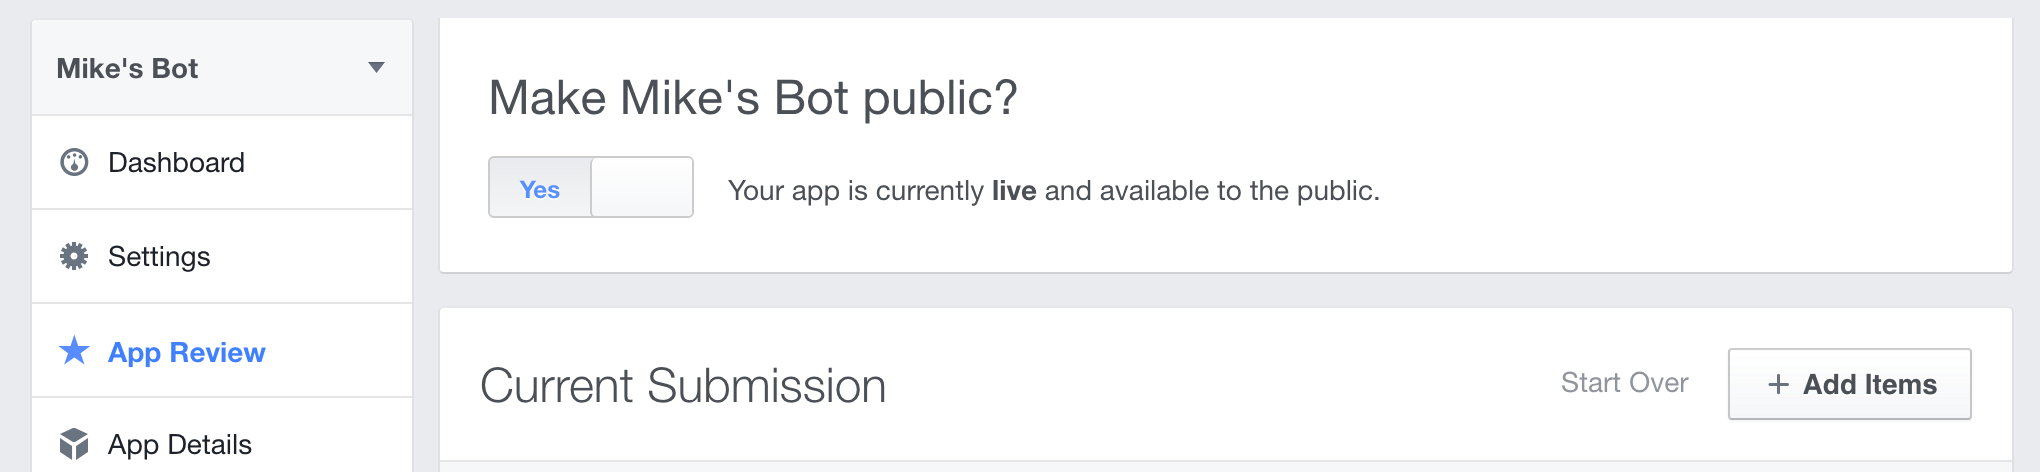
Toggle the "Make _APP_NAME_ Public" button to make it available to the public and have other users be able to interact with your bot.
While you are waiting for Facebook to approve your Facebook App, we also support polling for messages which will allow users to interact with your bot in the meantime.
To enable this, return to your bot's Admin Console on the Bot Libre website and go to the "Facebook" tab.
Click "Reply to messages (poll for messages)" and then "Save" to enable this feature. This does not require Facebook to approve your App.
You should disable this feature once your Facebook App has been approved, otherwise your bot will reply to messages twice.

If you got this far, congratulations, you have now connected your bot to Facebook Messenger. Now you can train your bot's responses and review its conversations from its "Training & Chat Logs" page in its Admin Console. If you encountered any issues, or would like our help setting up your bot please email us at support@botlibre.com or upgrade to our Platinum service and we can build your bot for you.