Azure is a cloud computing service created by Microsoft for building, testing, deploying, and managing applications and services through Microsoft-managed data centres. Azure Virtual Machines (VM) is one of several types of on-demand, scalable computing resources that Azure offers.
This guide is to work through the steps to install Bot Libre platform to the Azure VM.
Step 1. Create an Azure Virtual Machine
First go to Azure website https://signup.azure.com and sign up a new account if you do not have one yet.
Then login, and go to Azure portal site: https://portal.azure.com/
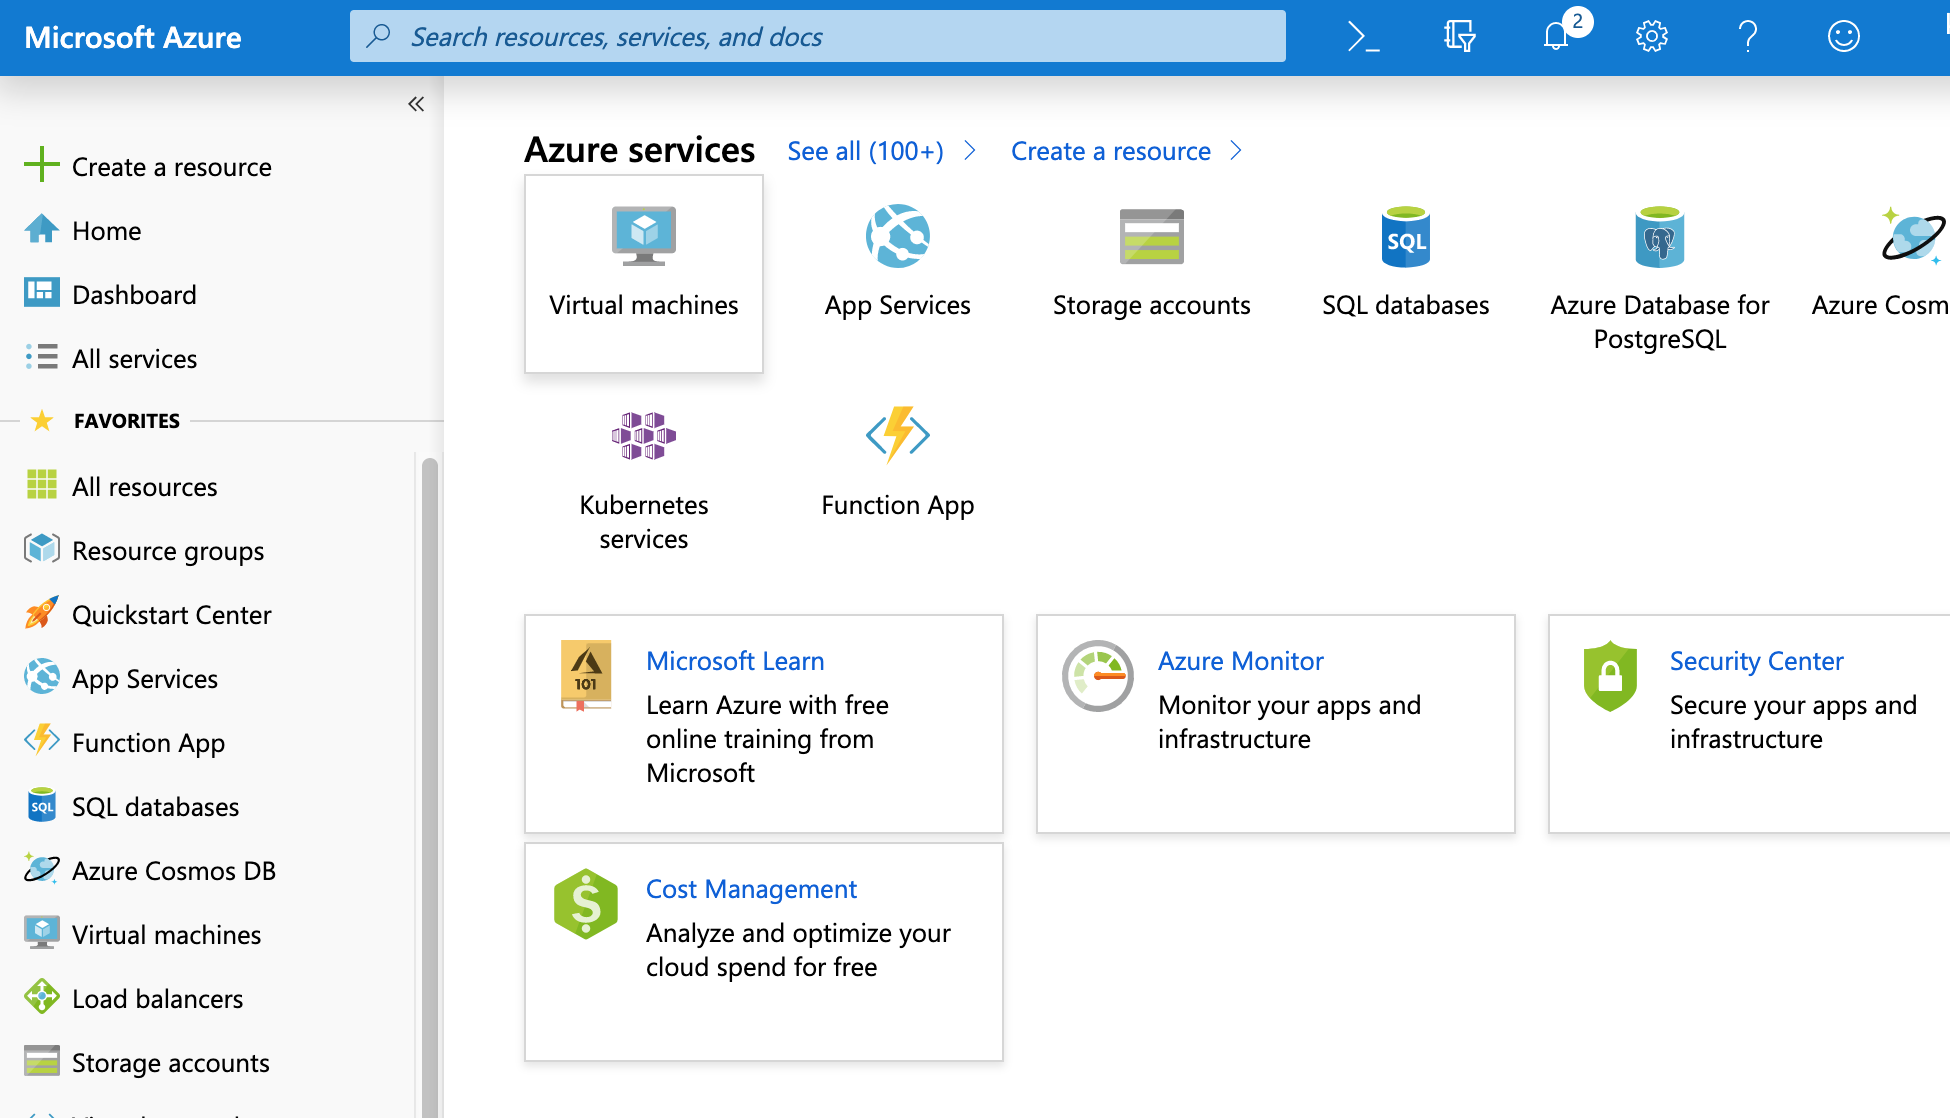
And click the ‘Virtual machine’ button below and follow the steps to create a new VM.
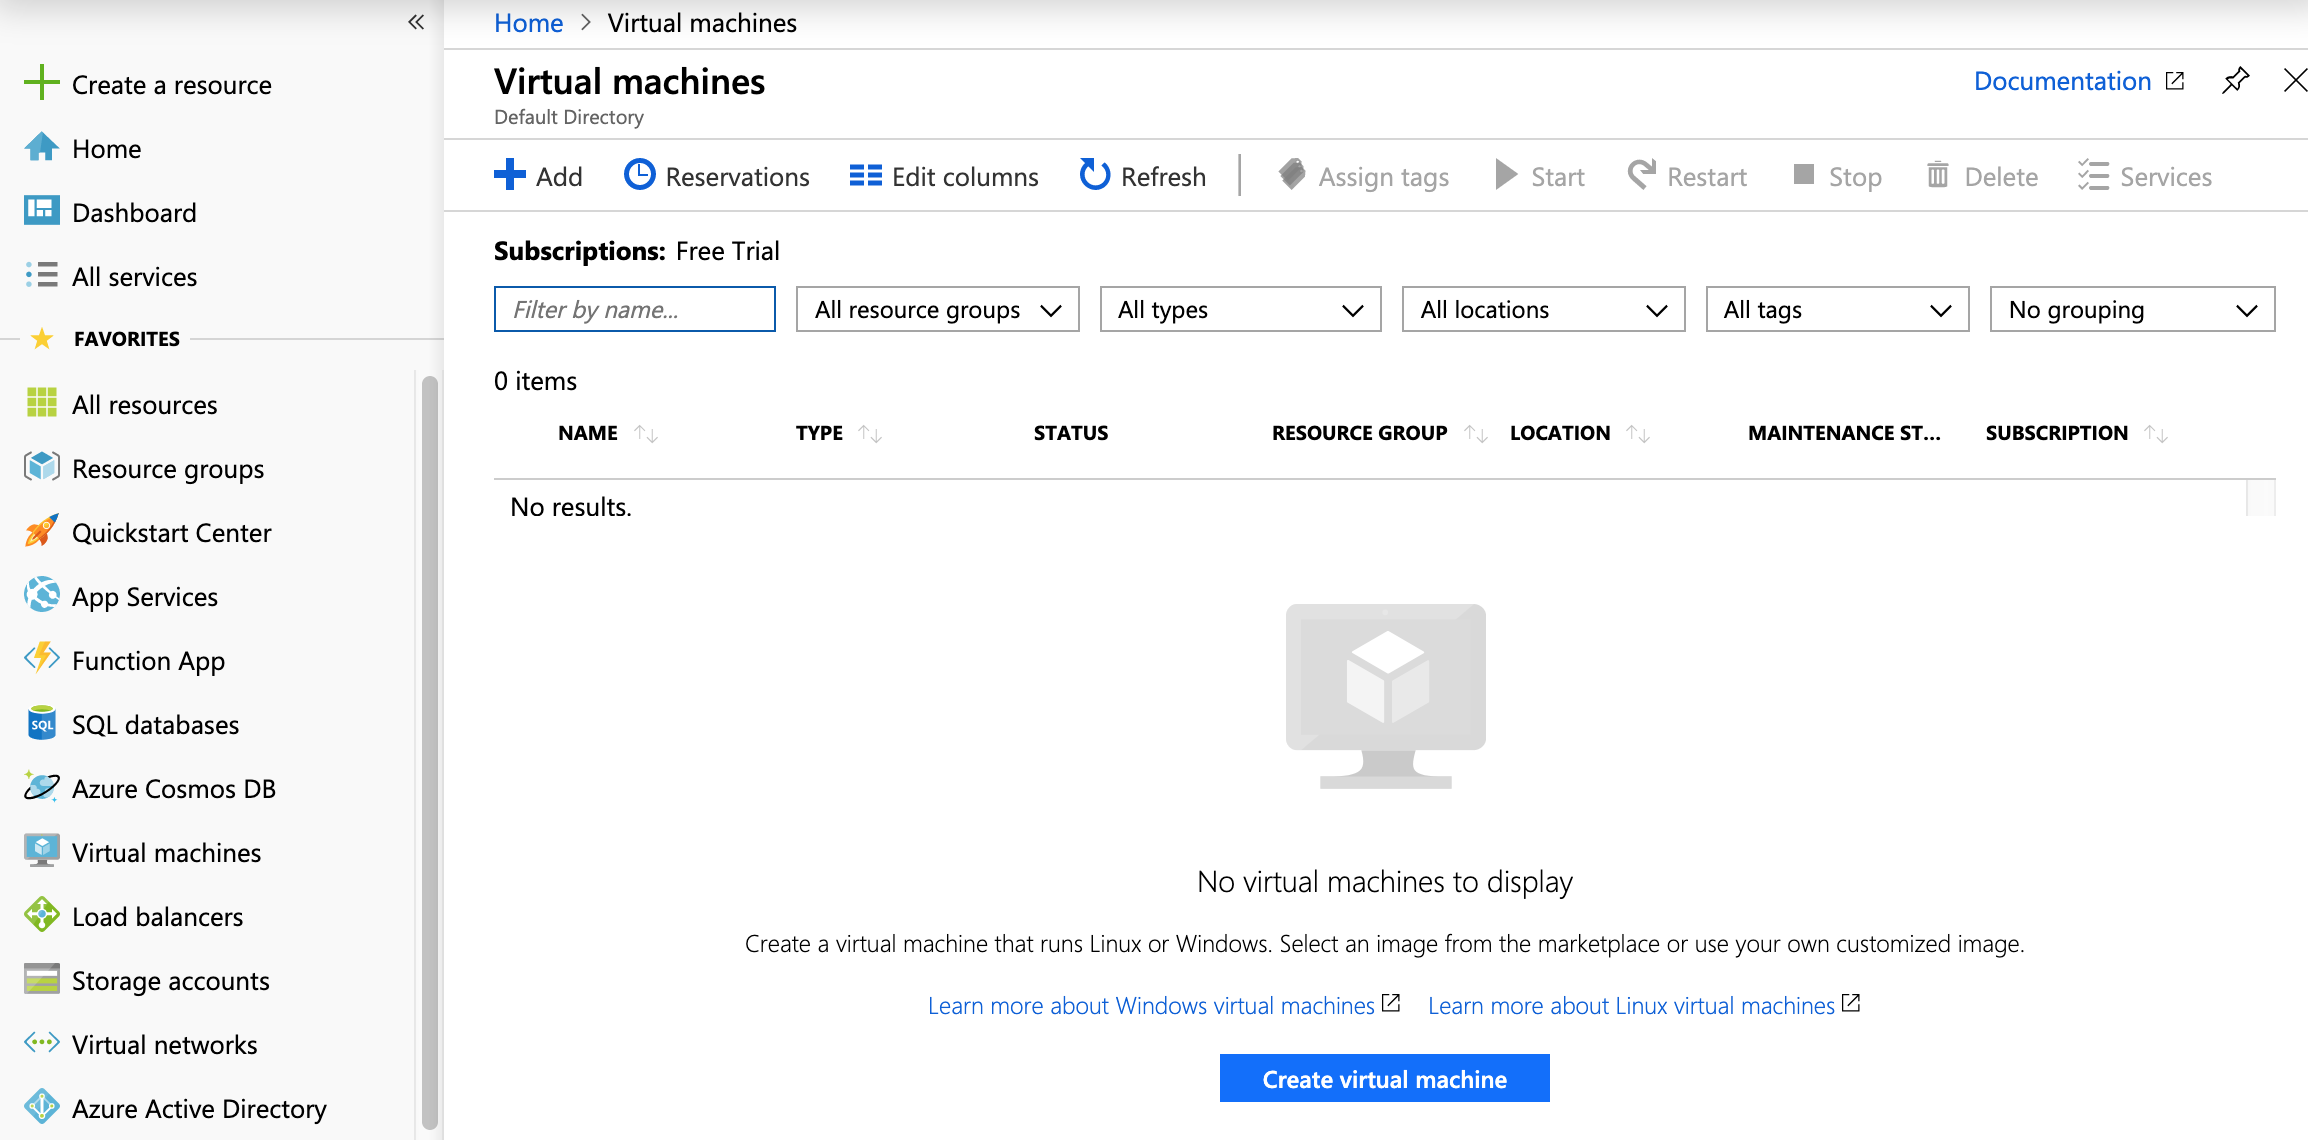
From the new Virtual machines creation page, click blue ‘Create virtual machine’ button.
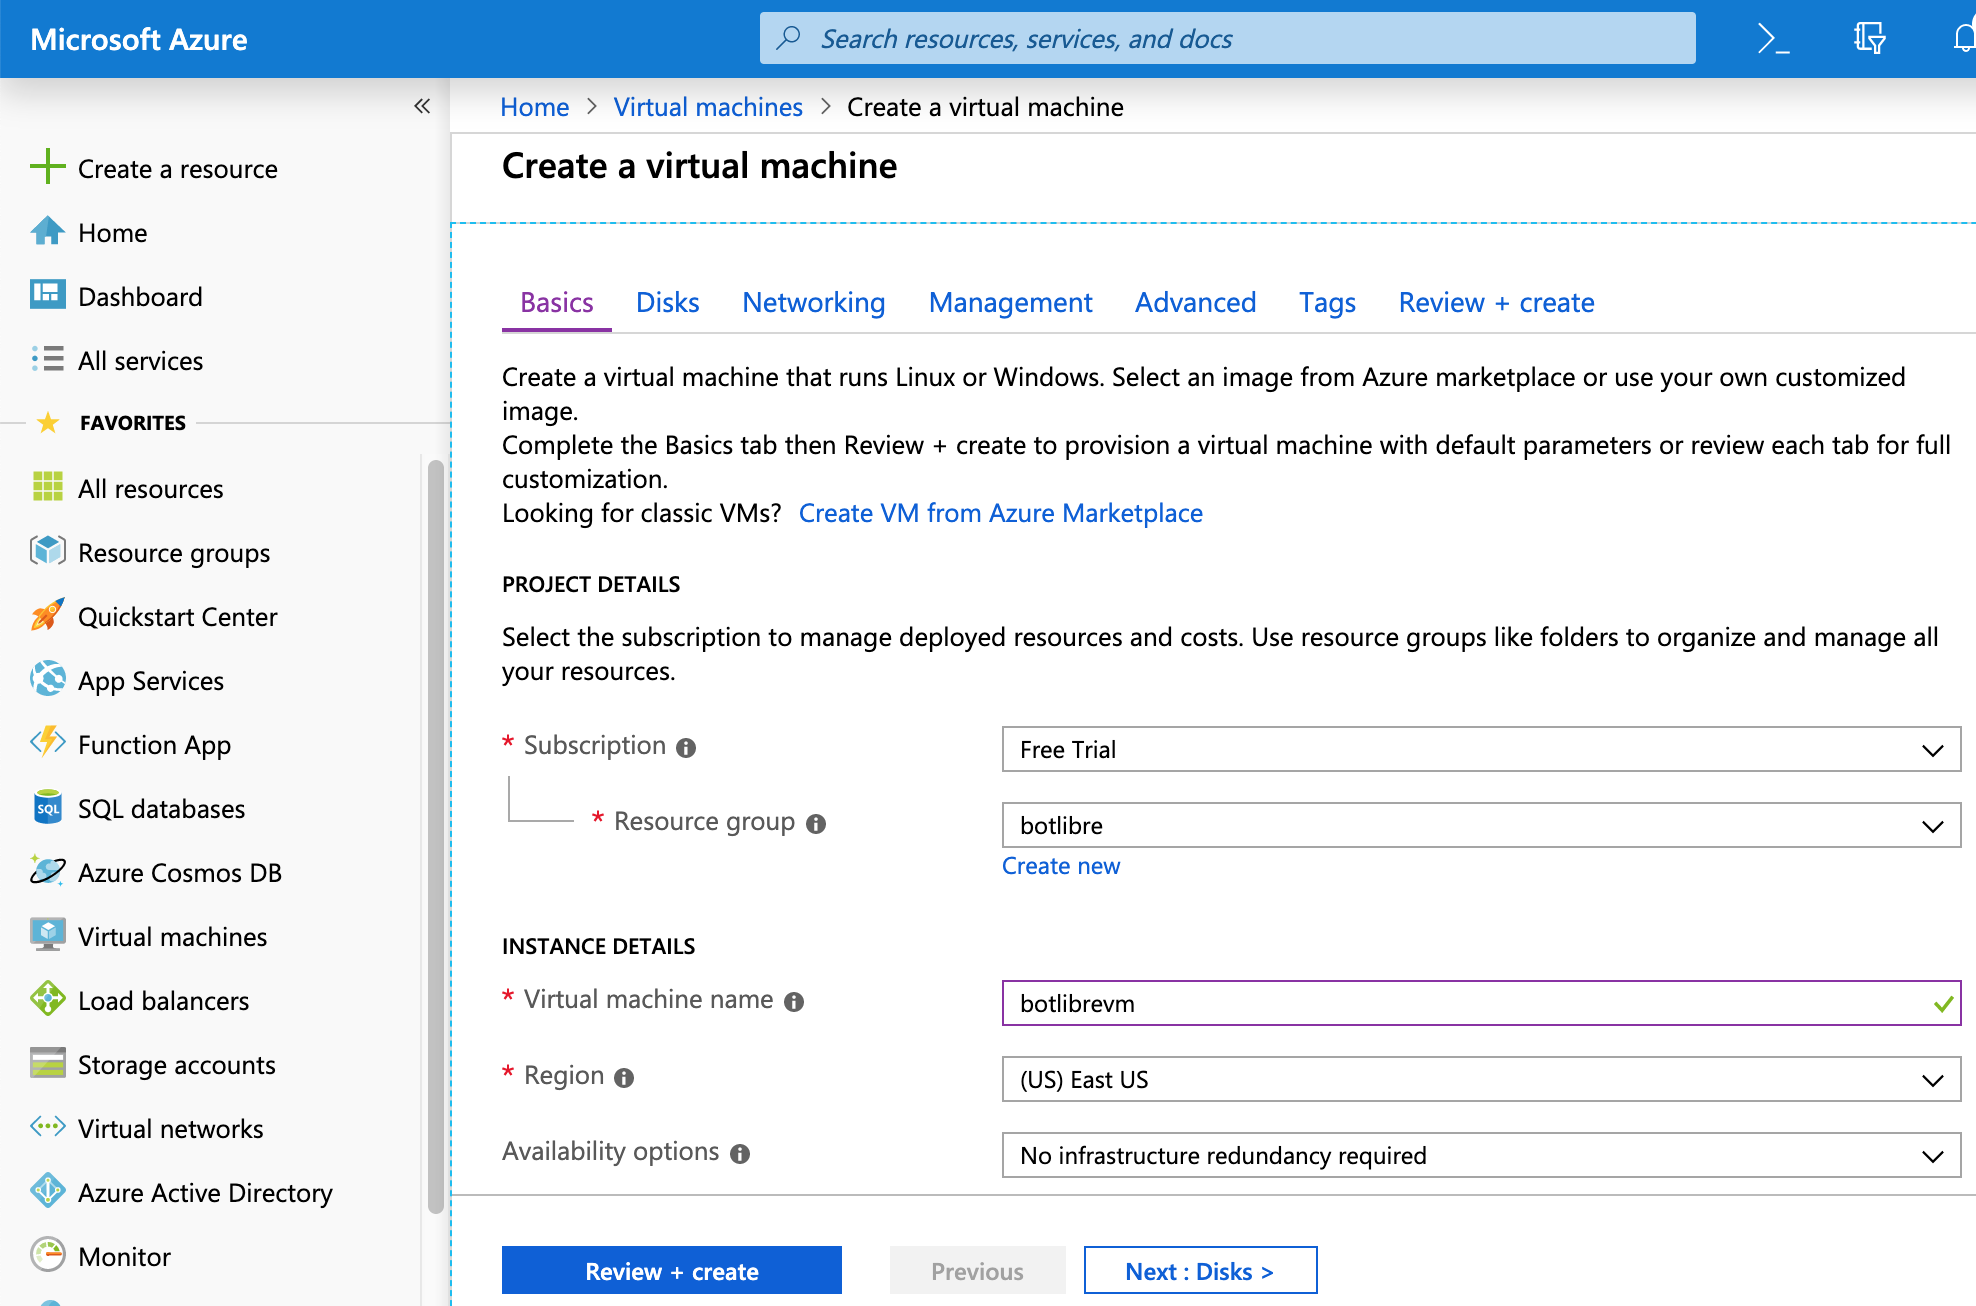
From the “Basics” configuration page, specify a VM name (e.g. botlibrevm) and select the region close to your location (e.g. East US)
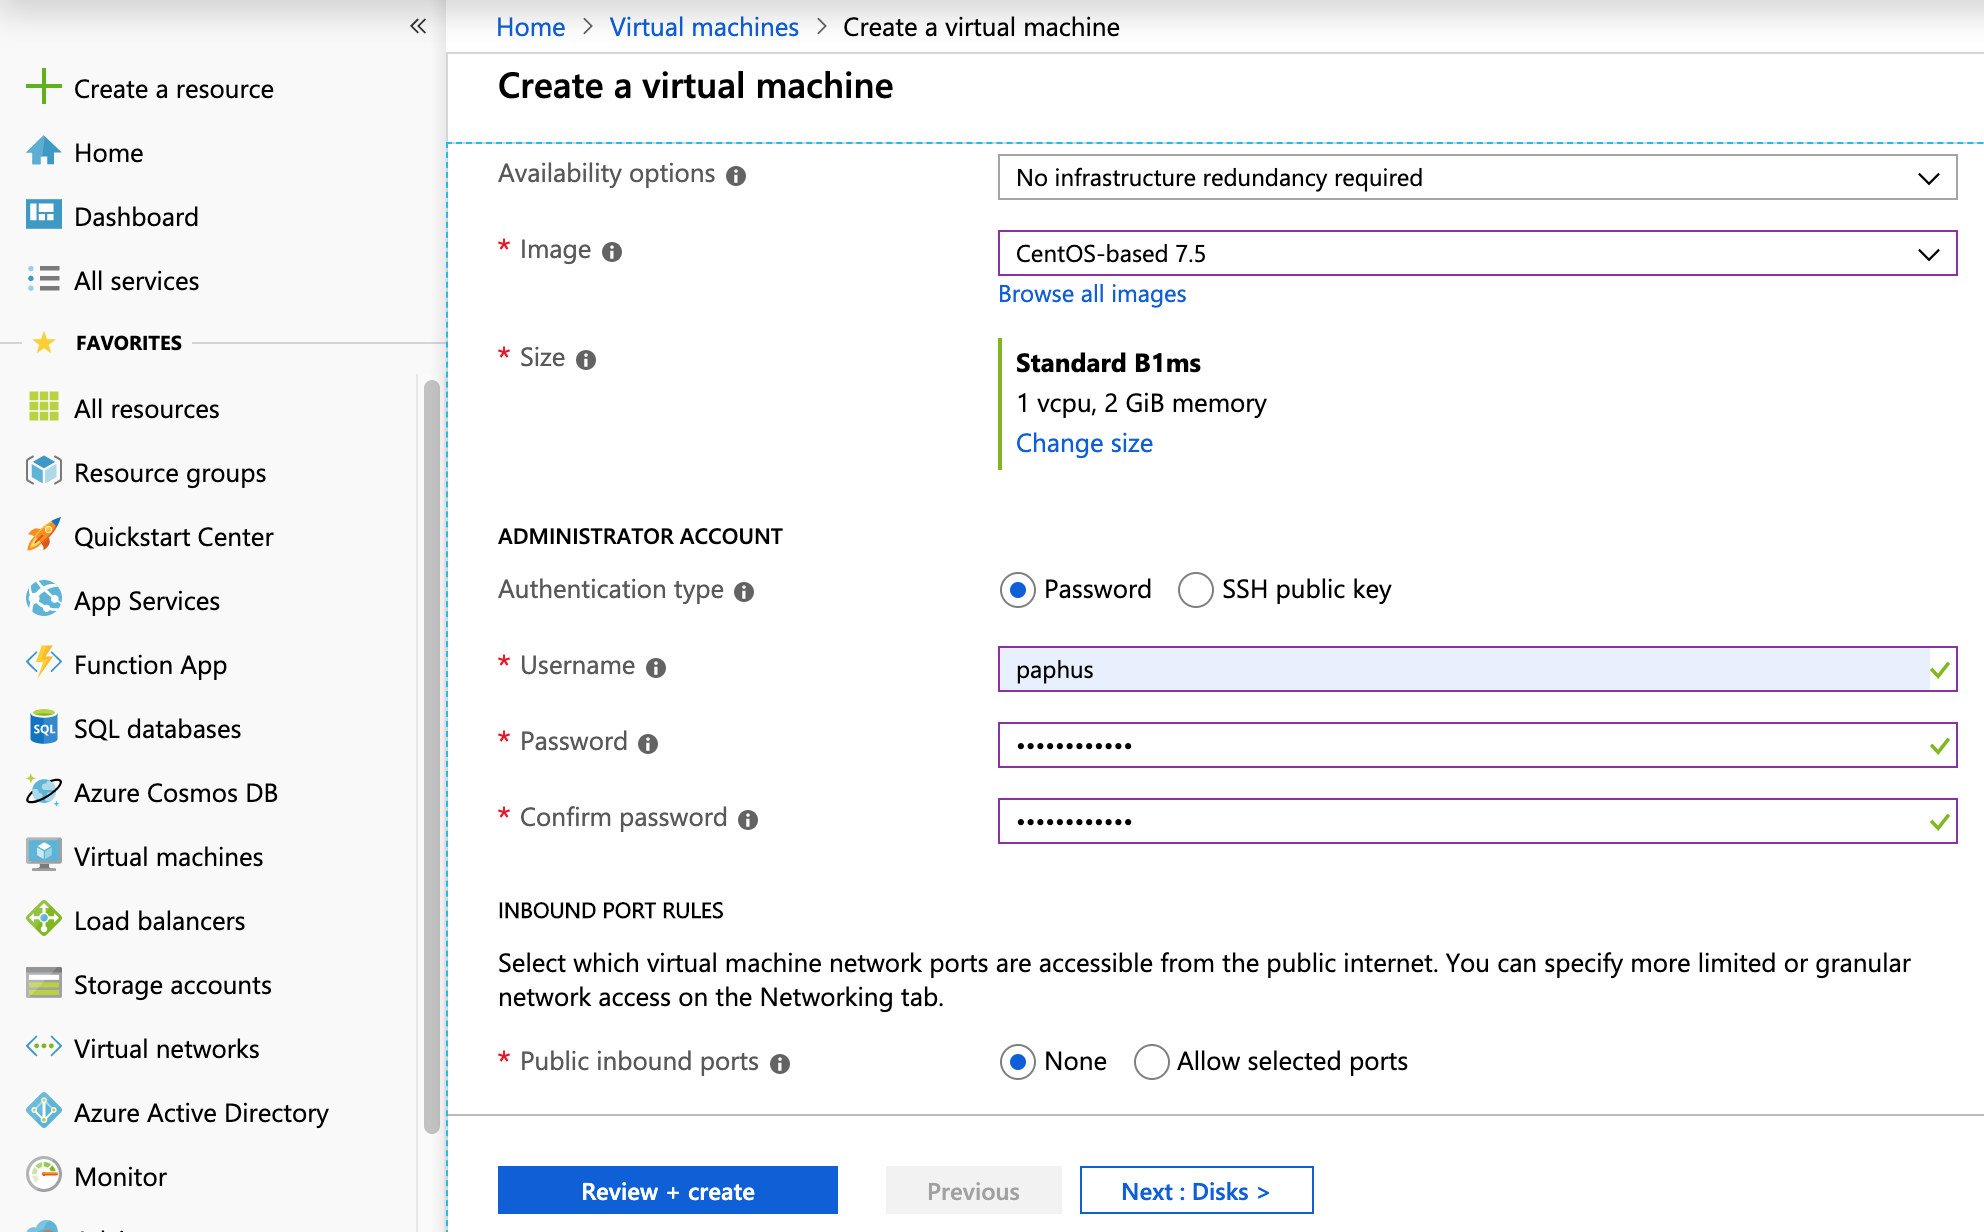
From the same Basics configuration page, scroll down, and select Image with CentOS-based 7.5. CentOS is our recommended OS installing platform. For the size, we recommend at least 16GM RAM and 2TB hard disk in two CPUs for the production environment. For the demo purpose, we choose the basic size of 1 cpu and 2GB RAM.
Then specify to use user/password to SSH remote access to the VM.
Then click “review + create” blue button (above) to review and create the VM, and now see the Review page before committing the VM creation operation:
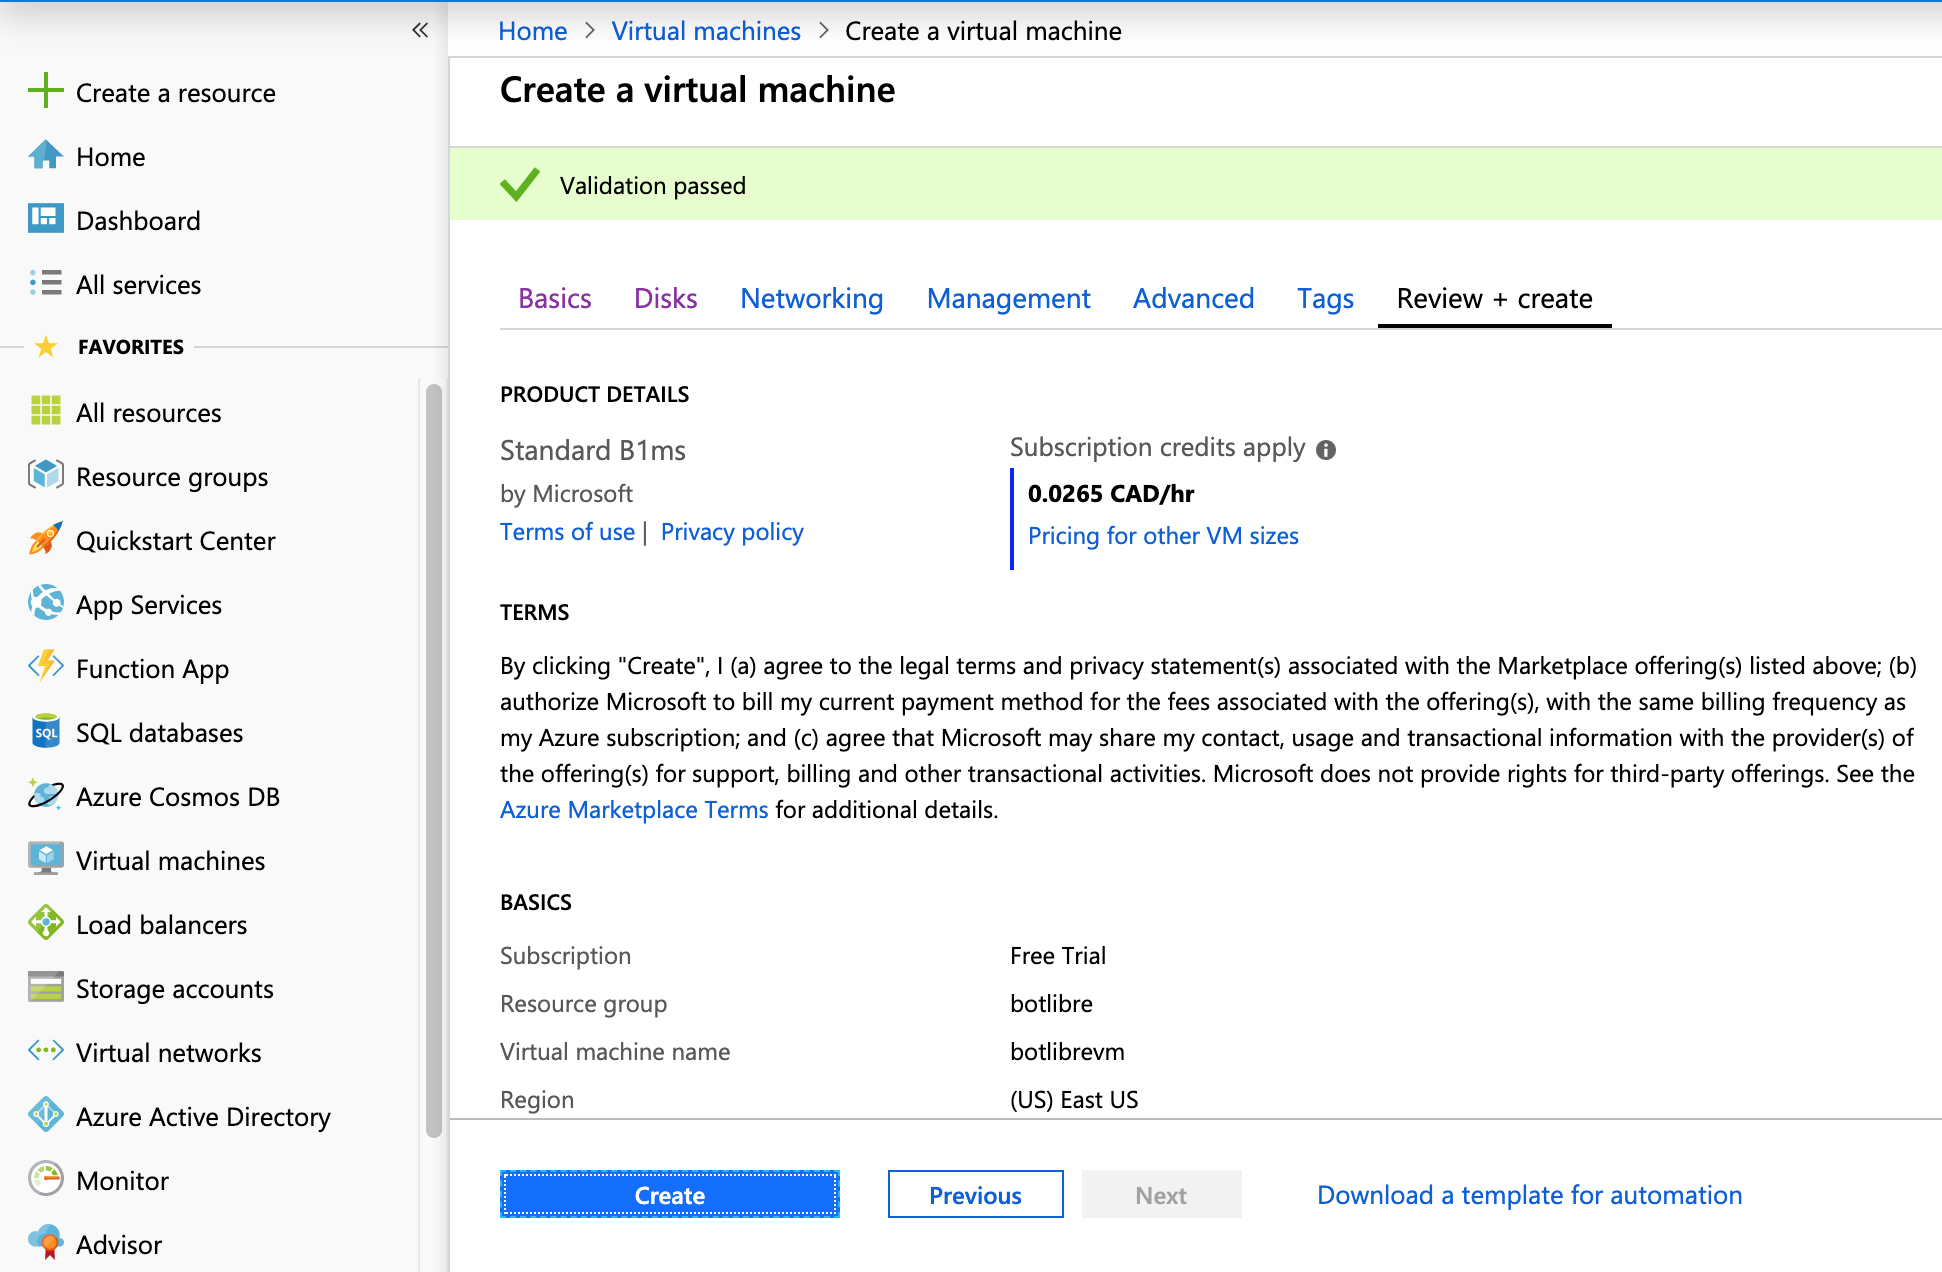
It then takes about 4-5 minutes to complete the image deployment.
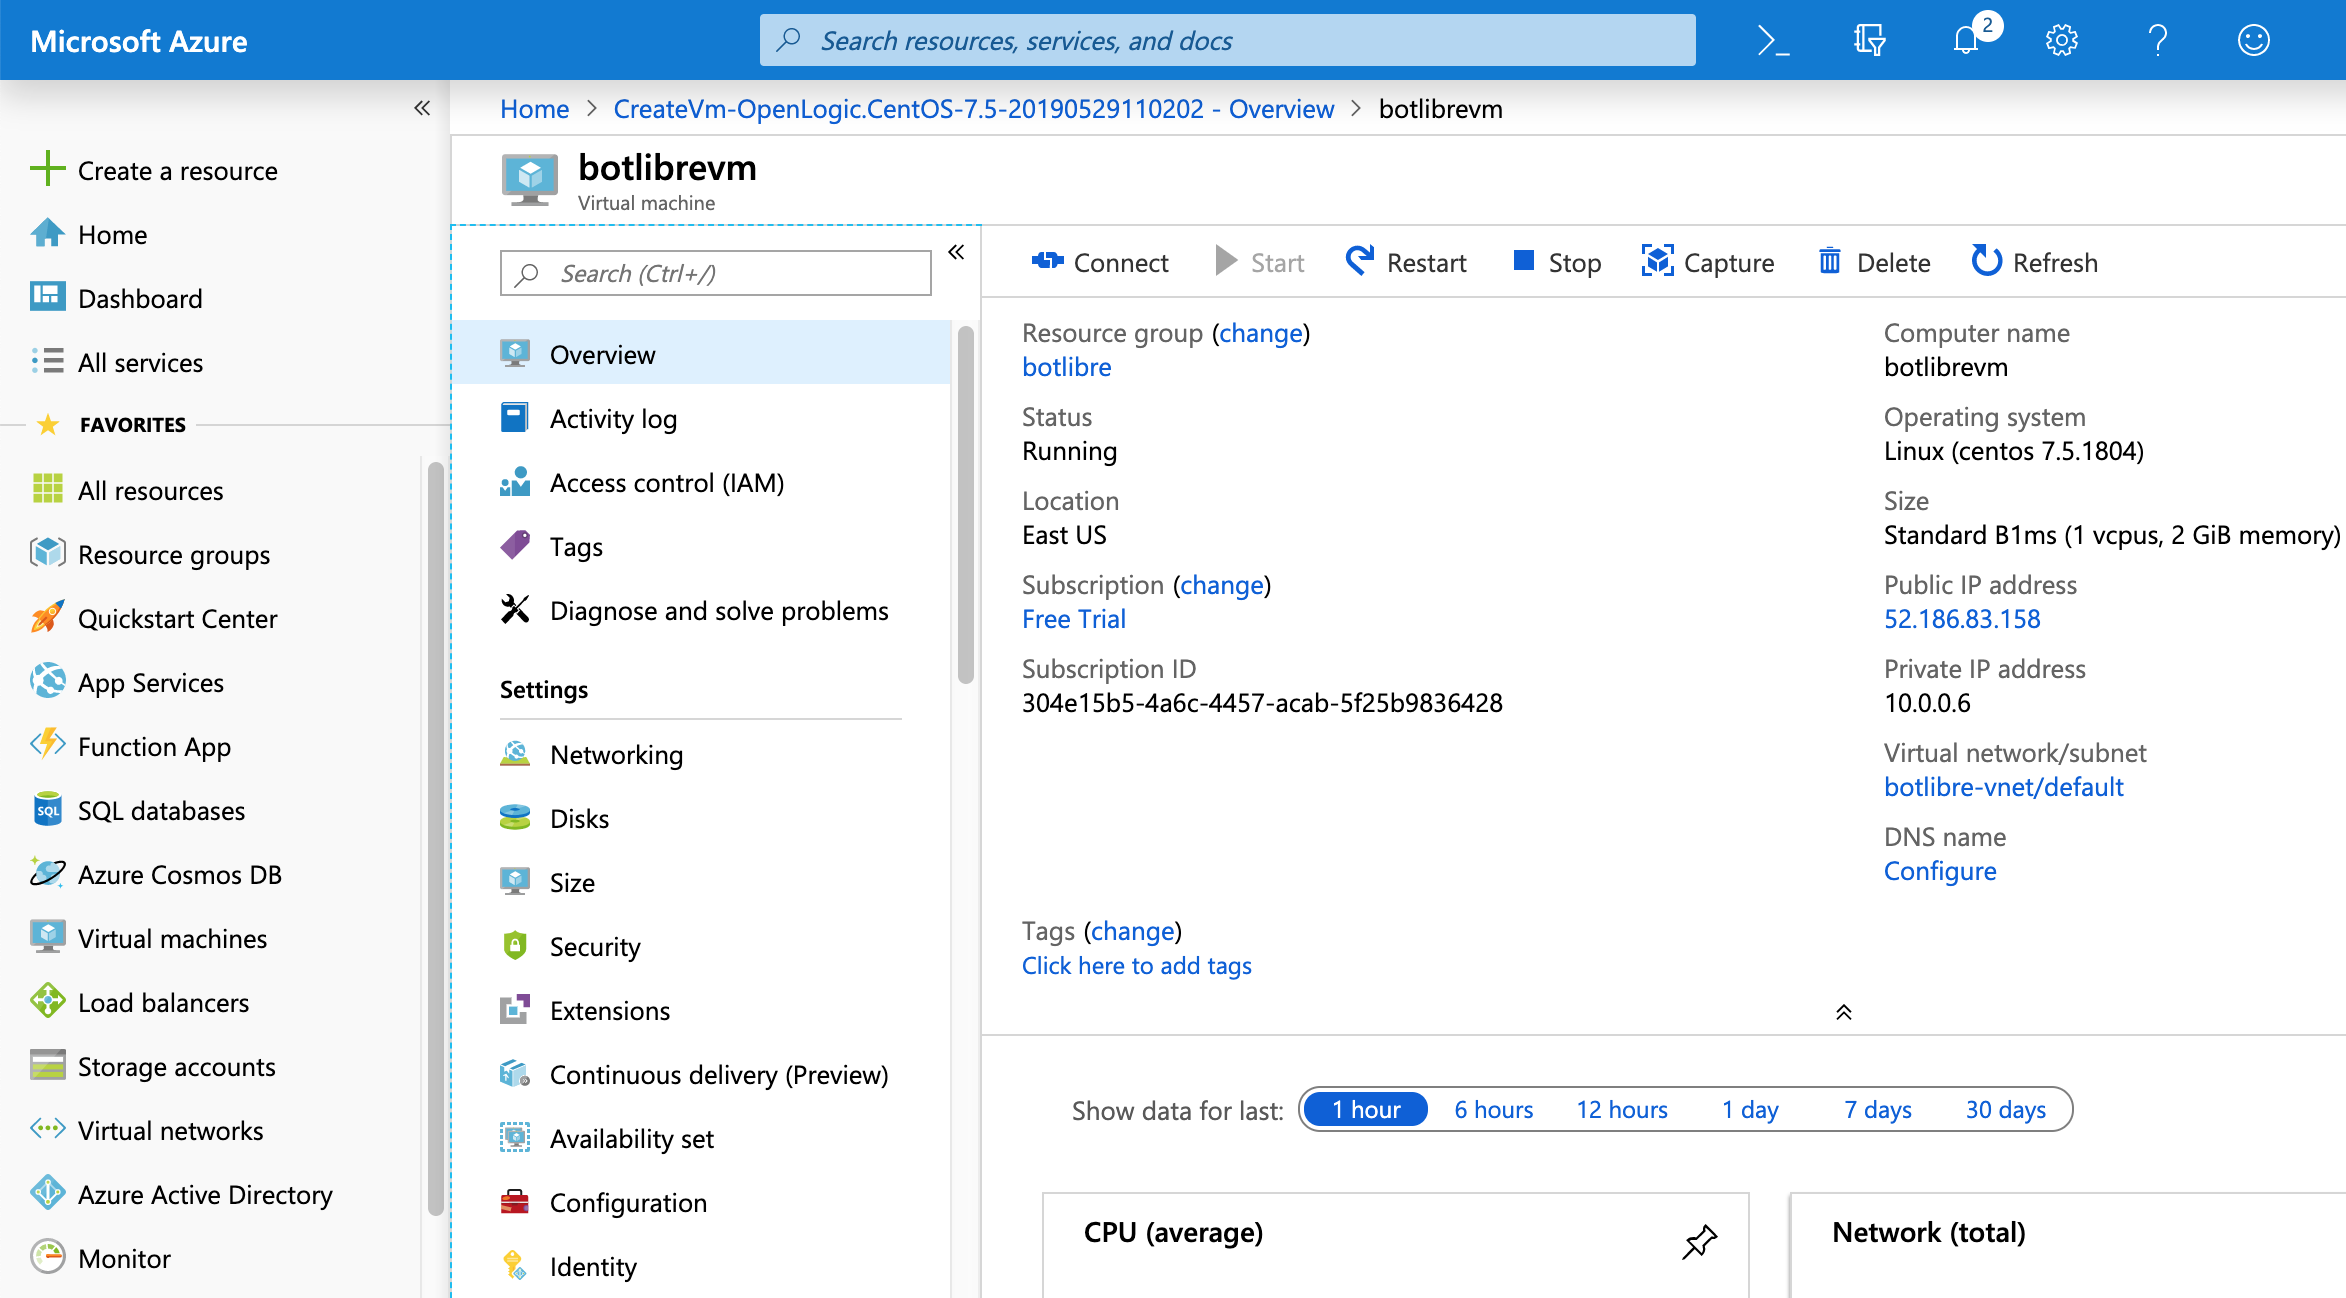
Azure assigns a public IP (e.g. 52.186.83.158) to the instance, and we need the IP to config the web server later on.
When the VM is ready, you can now access to it via Serial Console, or SSG remote access from a client terminal.
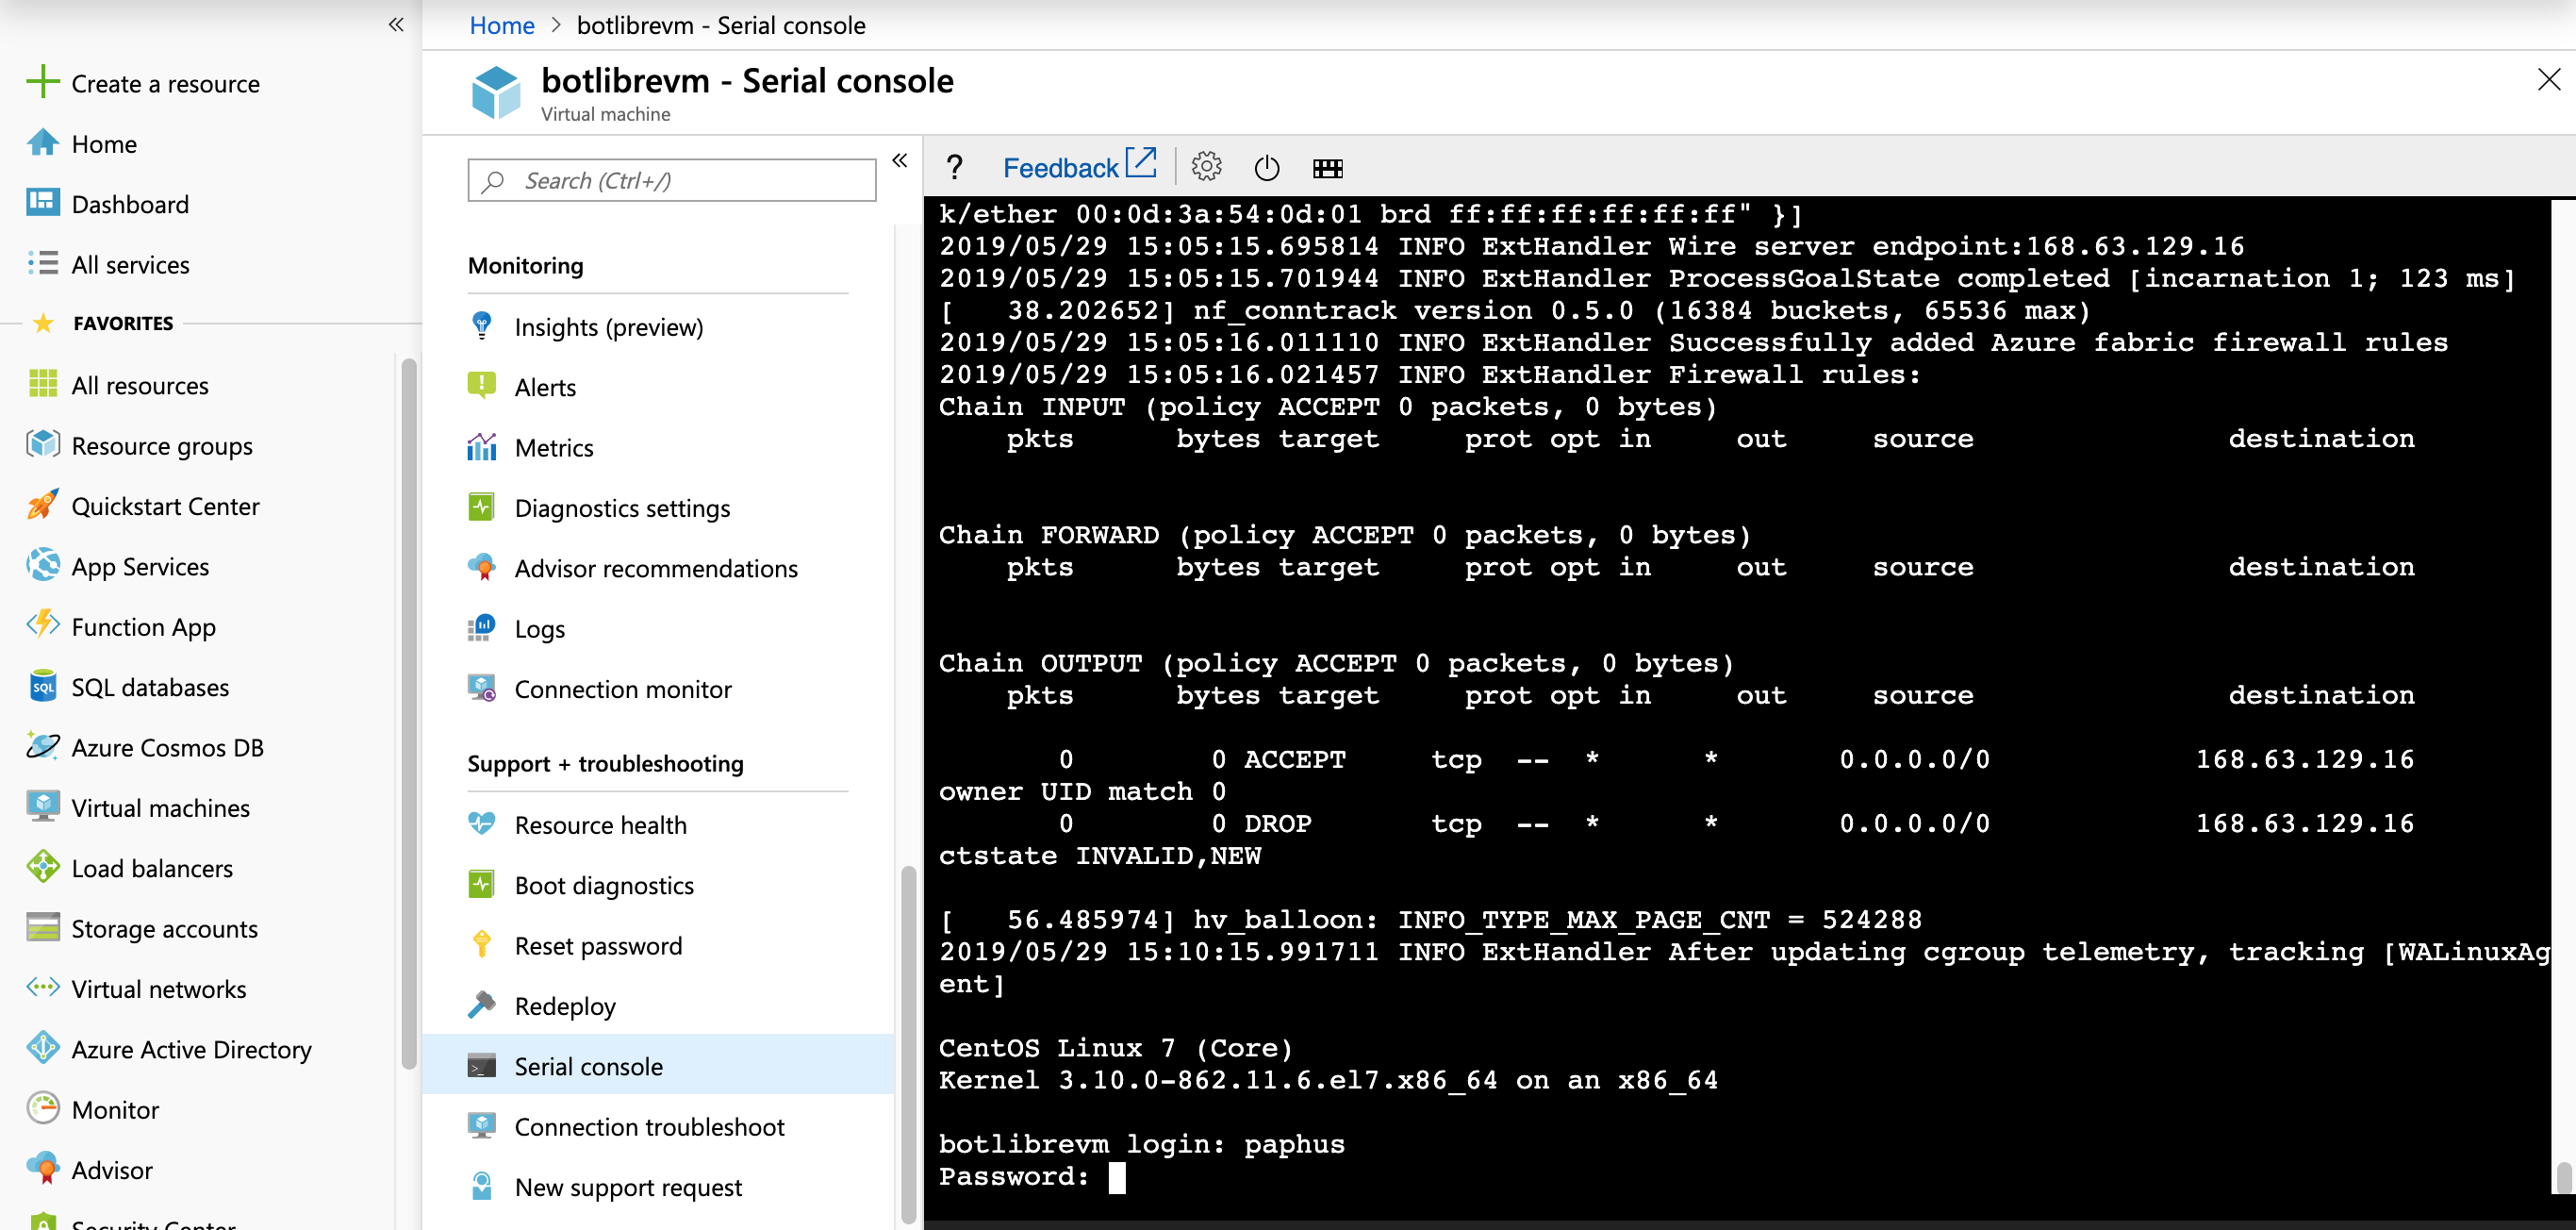
Azure's Virtual Machine Serial Console provides access to a text-based console for Linux or Windows Virtual Machines on Azure. This serial connection is to COM1 serial port of the virtual machine and provides access to the virtual machine regardless of that virtual machine's network/operating system state.
You can now use Azure Serial Console to connect to the VM. (from the VM main page, search Serial Console, or scroll down the menu and find the Serial Console from “Support + troubleshooting” section.
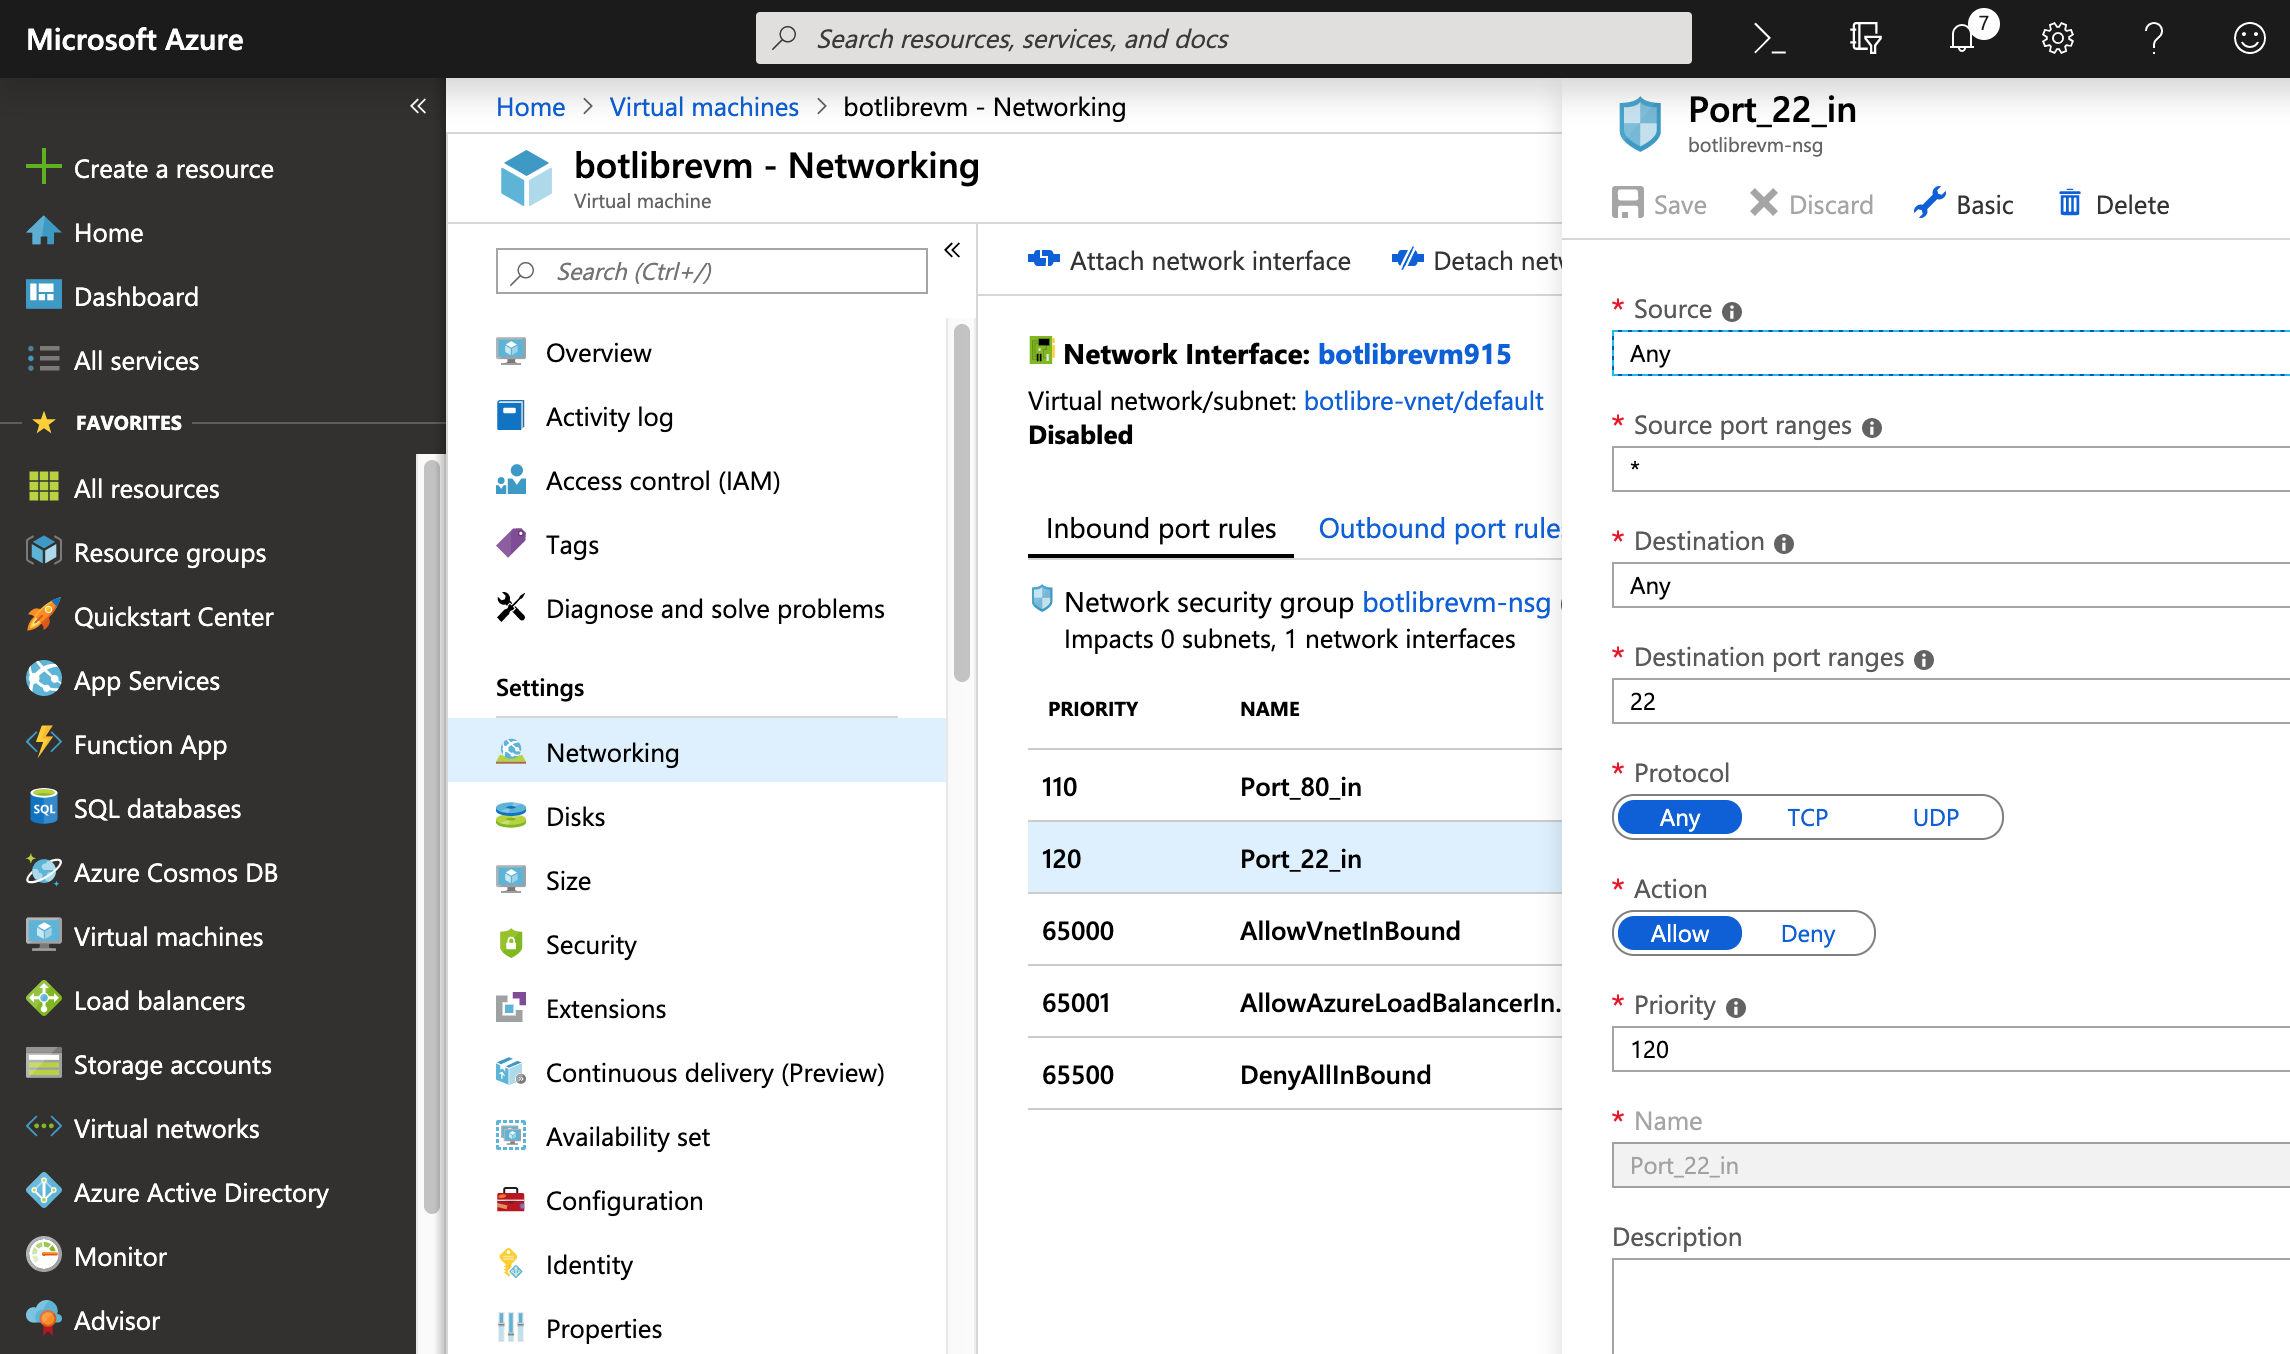
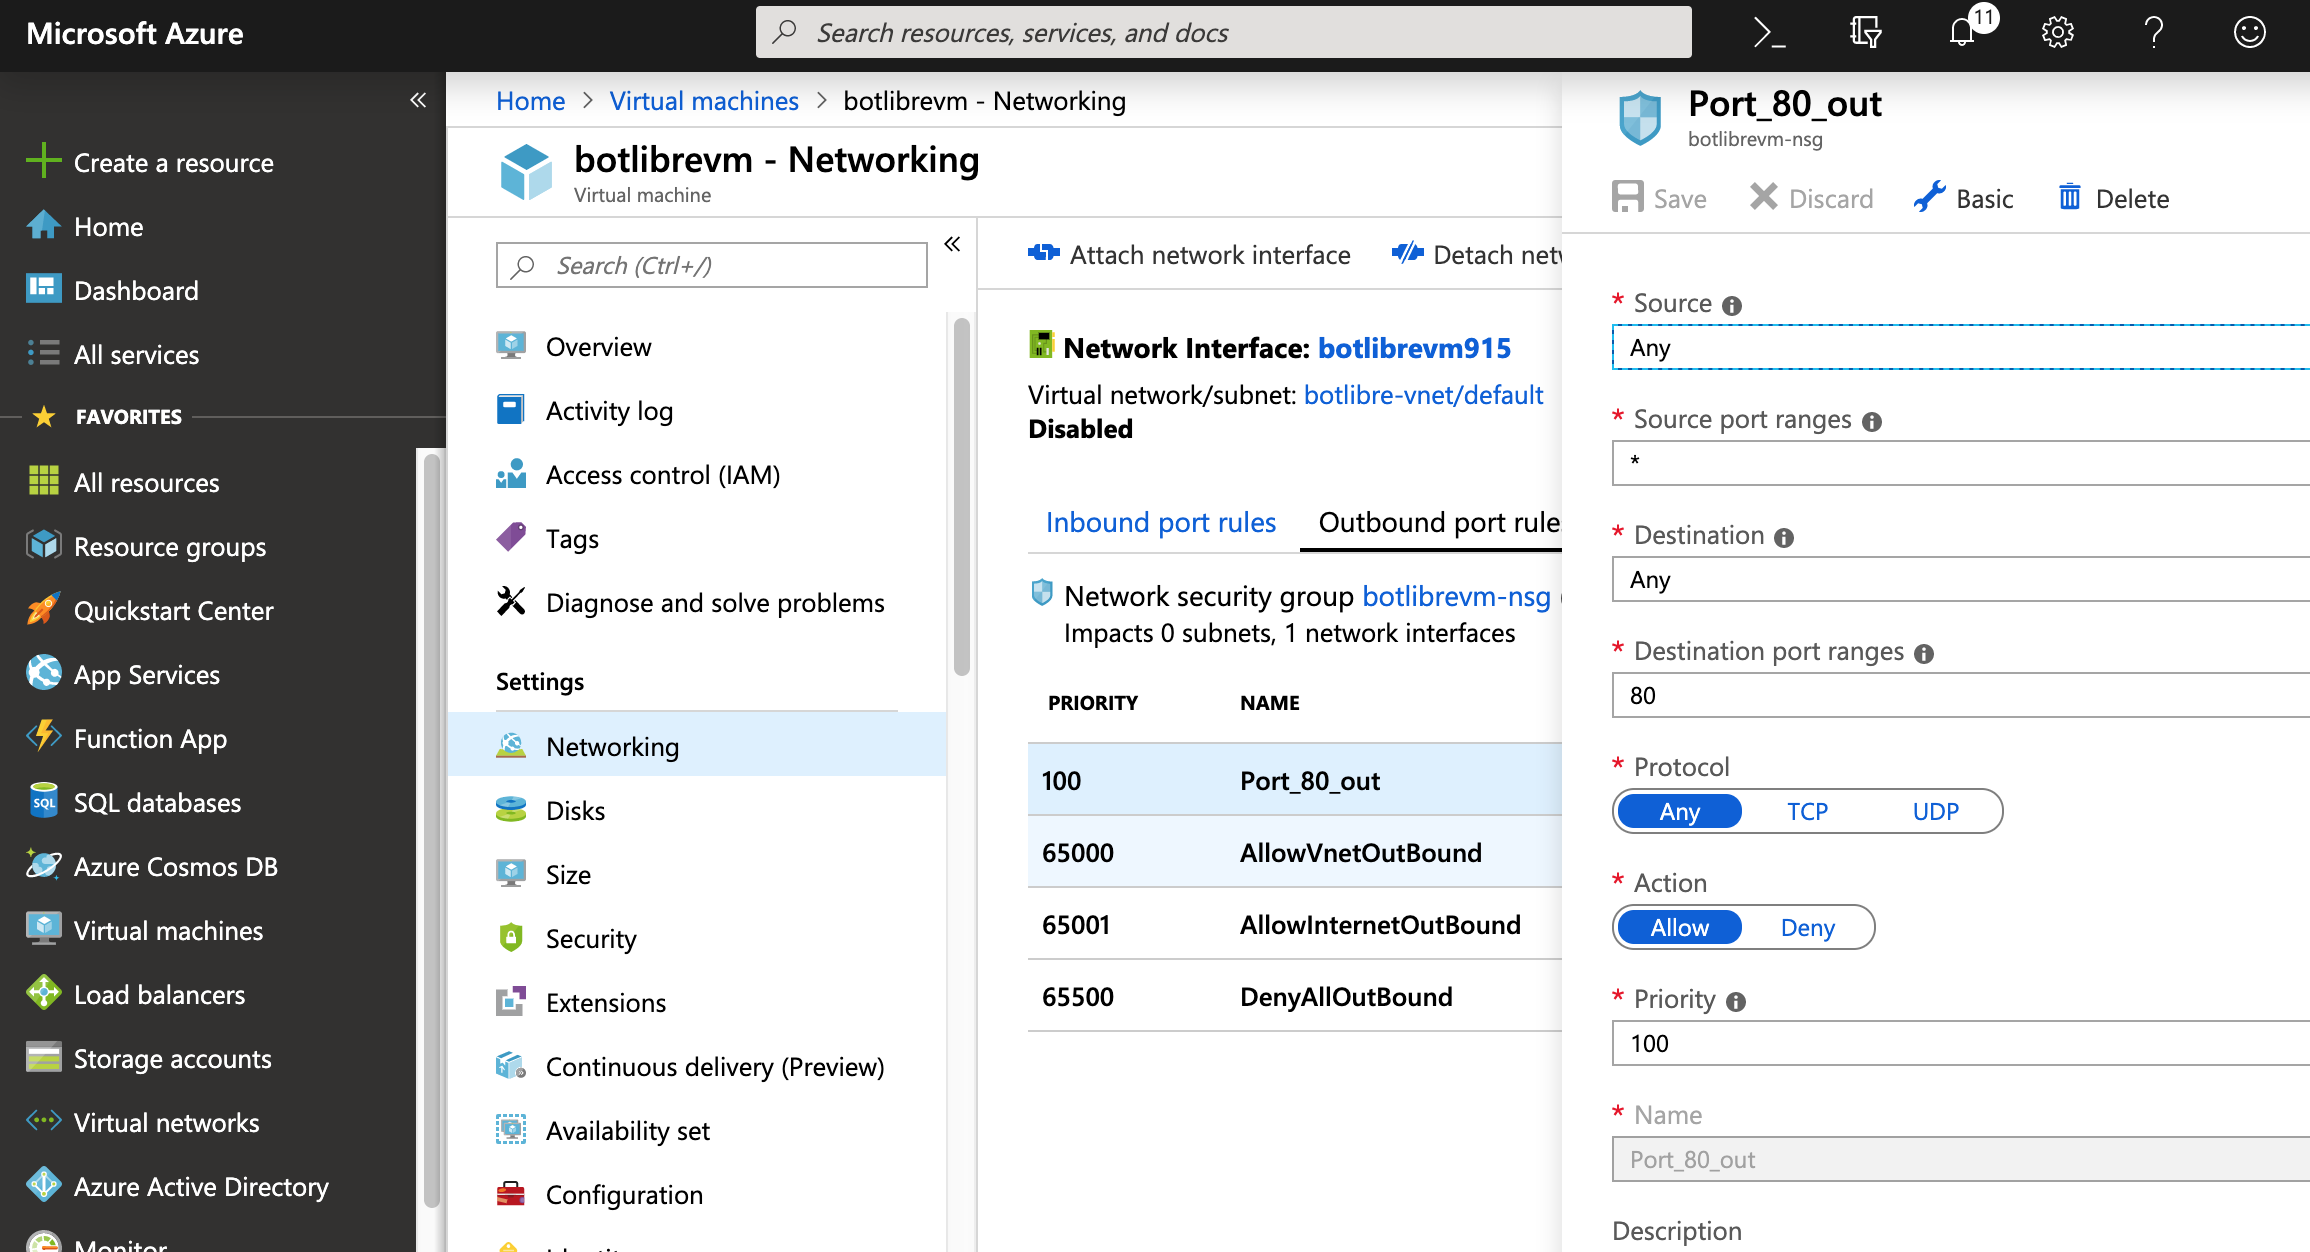
Last, you need to configure the VM networking to allow the inbound/outbound via specific port. You must add a pair of inbound/outbound port rules to allow the access of Tomcat server, which use the port 80.
If you choose ssh from a client terminal instead of using the Serial Console, you need to add the inbound port 22.
After connecting to the VM instance from the terminal or Azure Serial Console, you may start to setup the Java, Ant, Tomcat, Postgres, Python and finally deploy the botlibre web app to Tomcat.
Step 2. Install Java
>>Install the Java JDK 1.8 (latest dot release).
# sudo su root  (switch to root user)
# cd /opt
#  wget --no-cookies --no-check-certificate --header "Cookie: gpw_e24=http%3A%2F%2Fwww.oracle.com%2F; oraclelicense=accept-securebackup-cookie" "http://download.oracle.com/otn-pub/java/jdk/8u131-b11/d54c1d3a095b4ff2b6607d096fa80163/jdk-8u131-linux-x64.tar.gz"
# cd /opt/jdk1.8.0_131/
# alternatives --install /usr/bin/java java /opt/jdk1.8.0_131/bin/java 2
# export JAVA_HOME=/opt/jdk1.8.0_131
Step 3. Install Tomcat web server.
You can find the latest stable version (currently it’s 8.5.41) of Apache Tomcat 8 from its official download page.
Under the "Binary Distributions" section and then the "Core" list, right mouse click and save the http link pointing to the "tar.gz" archive:
# wget http://apache.mirror.colo-serv.net/tomcat/tomcat-8/v8.5.41/bin/apache-tomcat-8.5.41.tar.gz
# tar xzf apache-tomcat-8.5.41.tar.g
# export TOMCAT_HOME=/usr/local/tomcat8
# mv apache-tomcat-8.5.41 $TOMCAT_HOME
# vi $TOMCAT_HOME/bin/setenv.sh  (create a new setenv.sh file)
> add the following JVM option to increase the max memory size in your setenv.sh export JAVA_OPTS="-server -Xmx8g"
# vi $TOMCAT_HOME/conf/web.xml
>> insert the following XML in your web.xml to enable cors filters (required for JavaScript access)
     <filter>
            <filter-name>CorsFilter</filter-name>
            <filter-class>org.apache.catalina.filters.CorsFilter</filter-class>
            <init-param>
                   <param-name>cors.support.credentials</param-name>
                   <param-value>false</param-value>
             </init-param>
     </filter>
     <filter-mapping>
             <filter-name>CorsFilter</filter-name>
             <url-pattern>/rest/*</url-pattern>
      </filter-mapping>
      <error-page>
             <error-code>404</error-code>
             <location>/404.jsp</location>
      </error-page>
# vi $TOMCAT_HOME/conf/server.xml
>> update connector port 8080->80, 8433->433
>> add to connector, URIEncoding="UTF-8"
>> update host- <public ip> > autoDeploy=”false”
> Start tomcat web server:
# cd $TOMCAT_HOME/bin
# ./startup.sh
Go to a browser and check if the server is up and running at http://<public-ip> (e.g. http://52.186.83.158 )
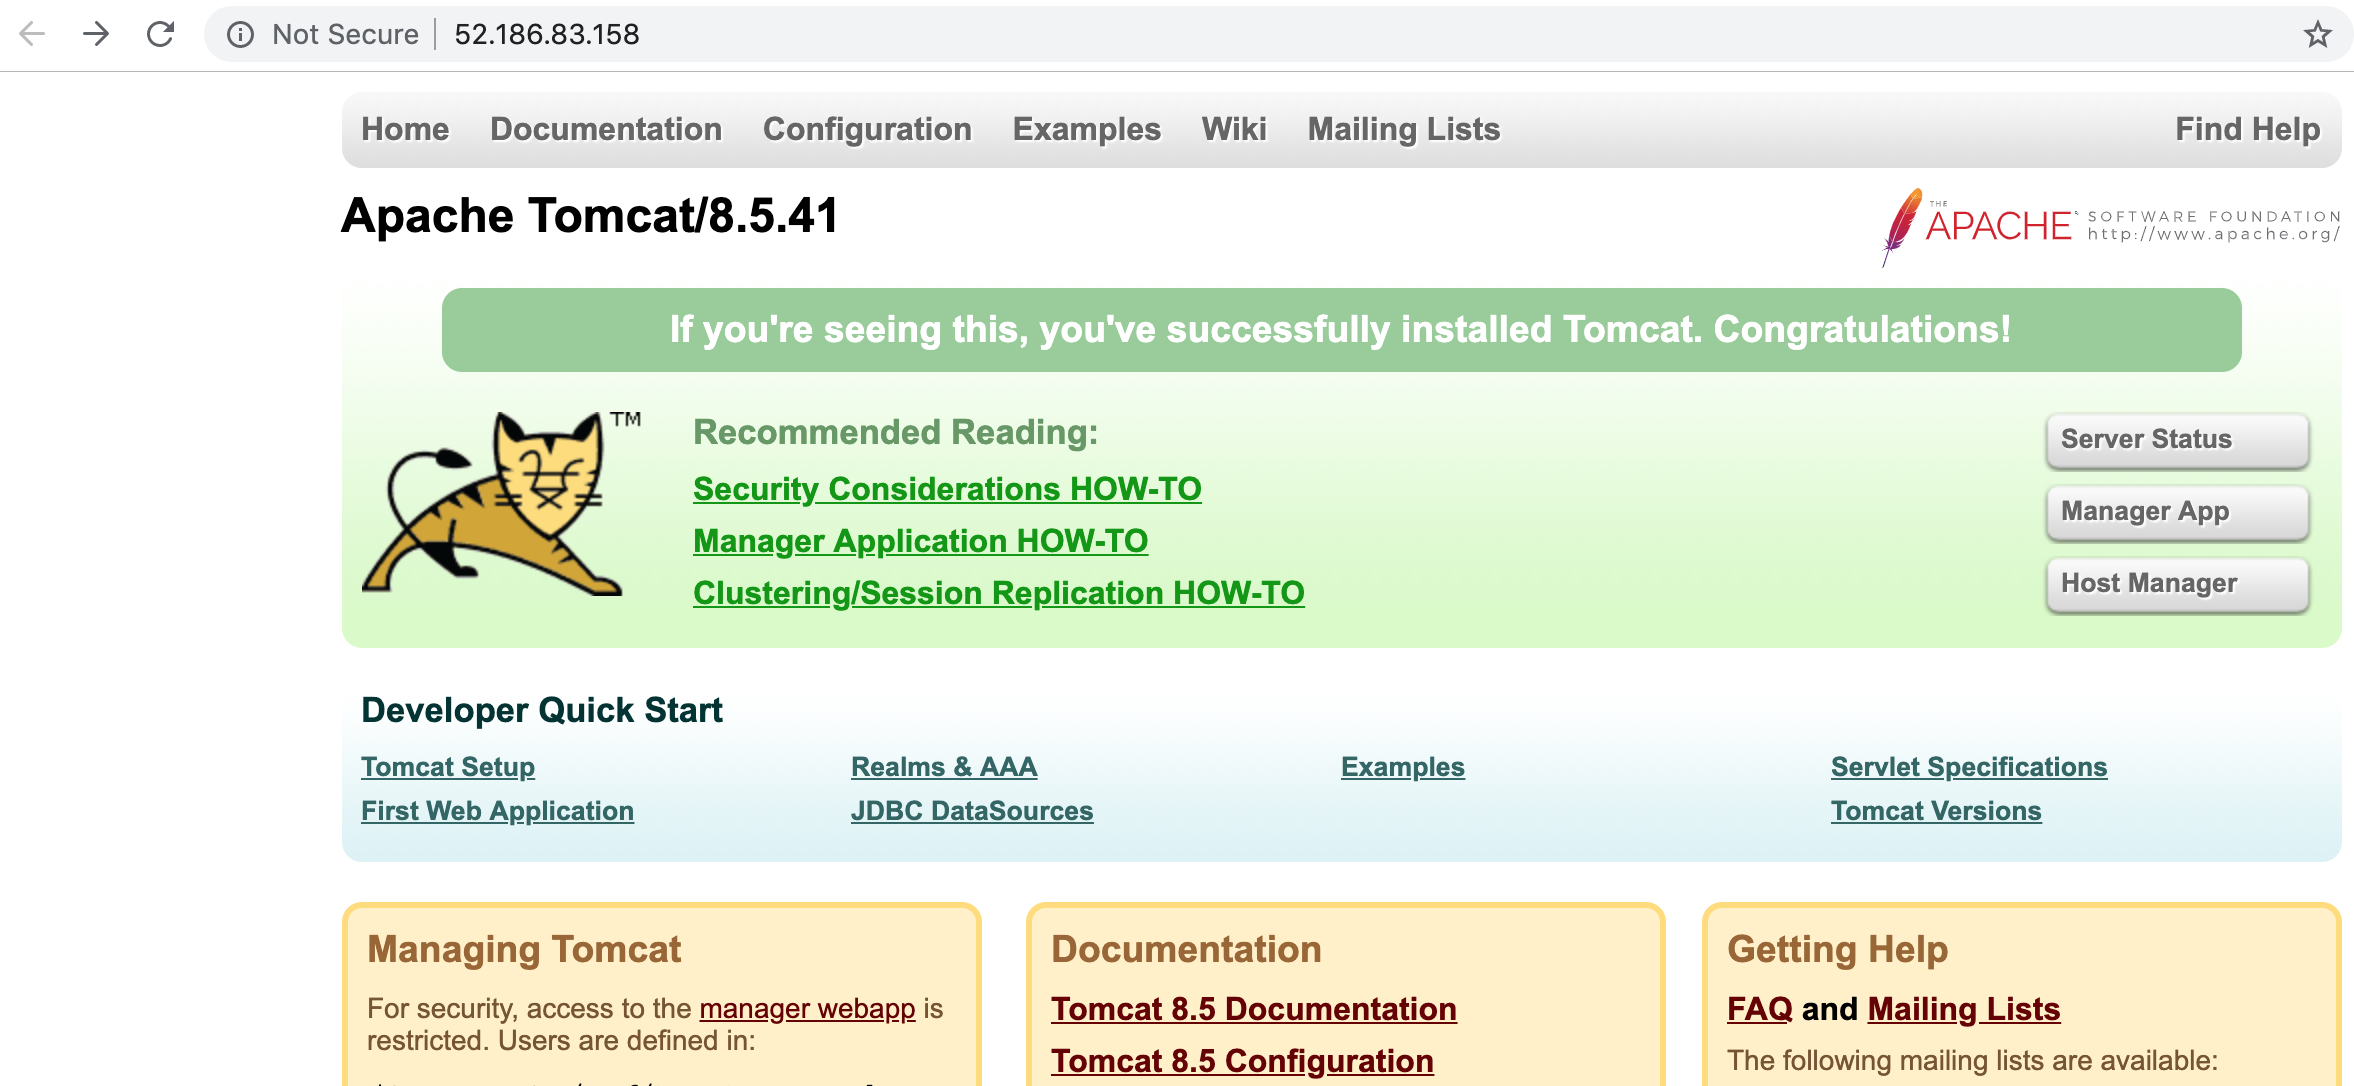
Troubleshooting: If you do not see the server running, check the server log at $TOMCAT_HOME/logs/catalina.out
Then shutdown the server:
# cd $TOMCAT_HOME/bin/
# ./shutdown.sh
Step 4. Install PostgreSQL database
Install the PostgreSQL 9.4 database.
>> first disable yum updates in case yum uses an older version
# vi /etc/yum.repos.d/CentOS-Base.repo
>> add lines to exclude postgresql from yum
[base]
...
exclude=postgresql*
[updates]
...
exclude=postgresql*
>> install postgres database and init it
# cd /otp
# rpm -Uvh http://yum.postgresql.org/9.4/redhat/rhel-6-x86_64/pgdg-centos94-9.4-3.noarch.rpm
# yum install postgresql94 postgresql94-server postgresql94-contrib
>> Switch to non-root user postgres
# su - postgres
# /usr/pgsql-9.4/bin/initdb /var/lib/pgsql/9.4/data
>>switch back to user ‘paphus’
# exit (this exit to root user, which Azure does not provide the password for root)
# su - paphus (switch to customer user)
# sudo service postgresql-9.4 start
>>[sudo] password for paphus: ****
Redirecting to /bin/systemctl start postgresql-9.4.service
# sudo service postgresql-9.4 stop . (stop database)
>> Configure restart:
# sudo chkconfig --levels 235 postgresql-9.4 on
>> Set database password:
# sudo service postgresql-9.4 start
# sudo -u postgres psql postgres \
# \password
>> here, type postgres as the database password for user postgres, twice
\q
Step 5. Install Python server
Bot Libre uses a separate Python web server to support deep learning analytics. Python is not required for bots or NLP, only deep learning analytics such as image classification. If you do not require deep learning you can skip this step.
Run the following commands, one by one, to install Python, Pop, Tensorflow, Flask and Psycopy2.
# sudo su root ( switch to root user)
# yum update
# yum install yum-utils
# yum groupinstall development
# yum -y install https://centos7.iuscommunity.org/ius-release.rpm
# yum -y install python36u
# yum -y install python36u-pip
# yum -y install python36u-devel
# pip3.6 install tensorflow==1.7
# pip3.6 install flask
# pip3.6 install psycopg2-binary
# pip3.6 install pillow
$ pip3.6 install lxml
# pip3.6 install Cython
# pip3.6 install jupyter
# pip3.6 install matplotlib
# pip3.6 install pandas
# pip3.6 install opencv-python
Then you may copy the /python from the BotLibre install to /usr/local/python
# mv <BotLibreInstallRoot>/python /usr/local/python
>> start the python server
# nohup python3.6 /usr/local/python/app.py &
>> Verify that the Python server is up and running
# wget http://localhost:6777/
>> Connecting to localhost (localhost)|127.0.0.1|:6777... connected.
HTTP request sent, awaiting response... 200 OK
Step 6. Install BotLibre
The Bot Libre application is a Java “war” file. A war file is a zip file that contains a website and Java libraries
There are several installation steps:
- Copy library jars to /usr/local/tomcat8/lib (from bot libre lib sub directories, do not copy botlibre-ai.jar, do not copy botlibreplatform.jar, do not overwrite any files already in tomcat lib)
- Copy speech voice files to /usr/local/tomcat8/bin/lib (unzip speech voice zip into lib voices directory)
- Shutdown Tomcat server: cd $TOMCAT_HOME/bin/; ./shutdown.sh
- Deploy war file by emptying the $TOMCAT_HOME/webapps/ directory, and copying the botlibreplatform.war to $TOMCAT_HOME/webapps/ROOT.war.
- Start Tomcat Server: cd $TOMCAT_HOME/bin/; ./startup.sh
- Open http://<public-ip> e.g. http://52.186.83.158/
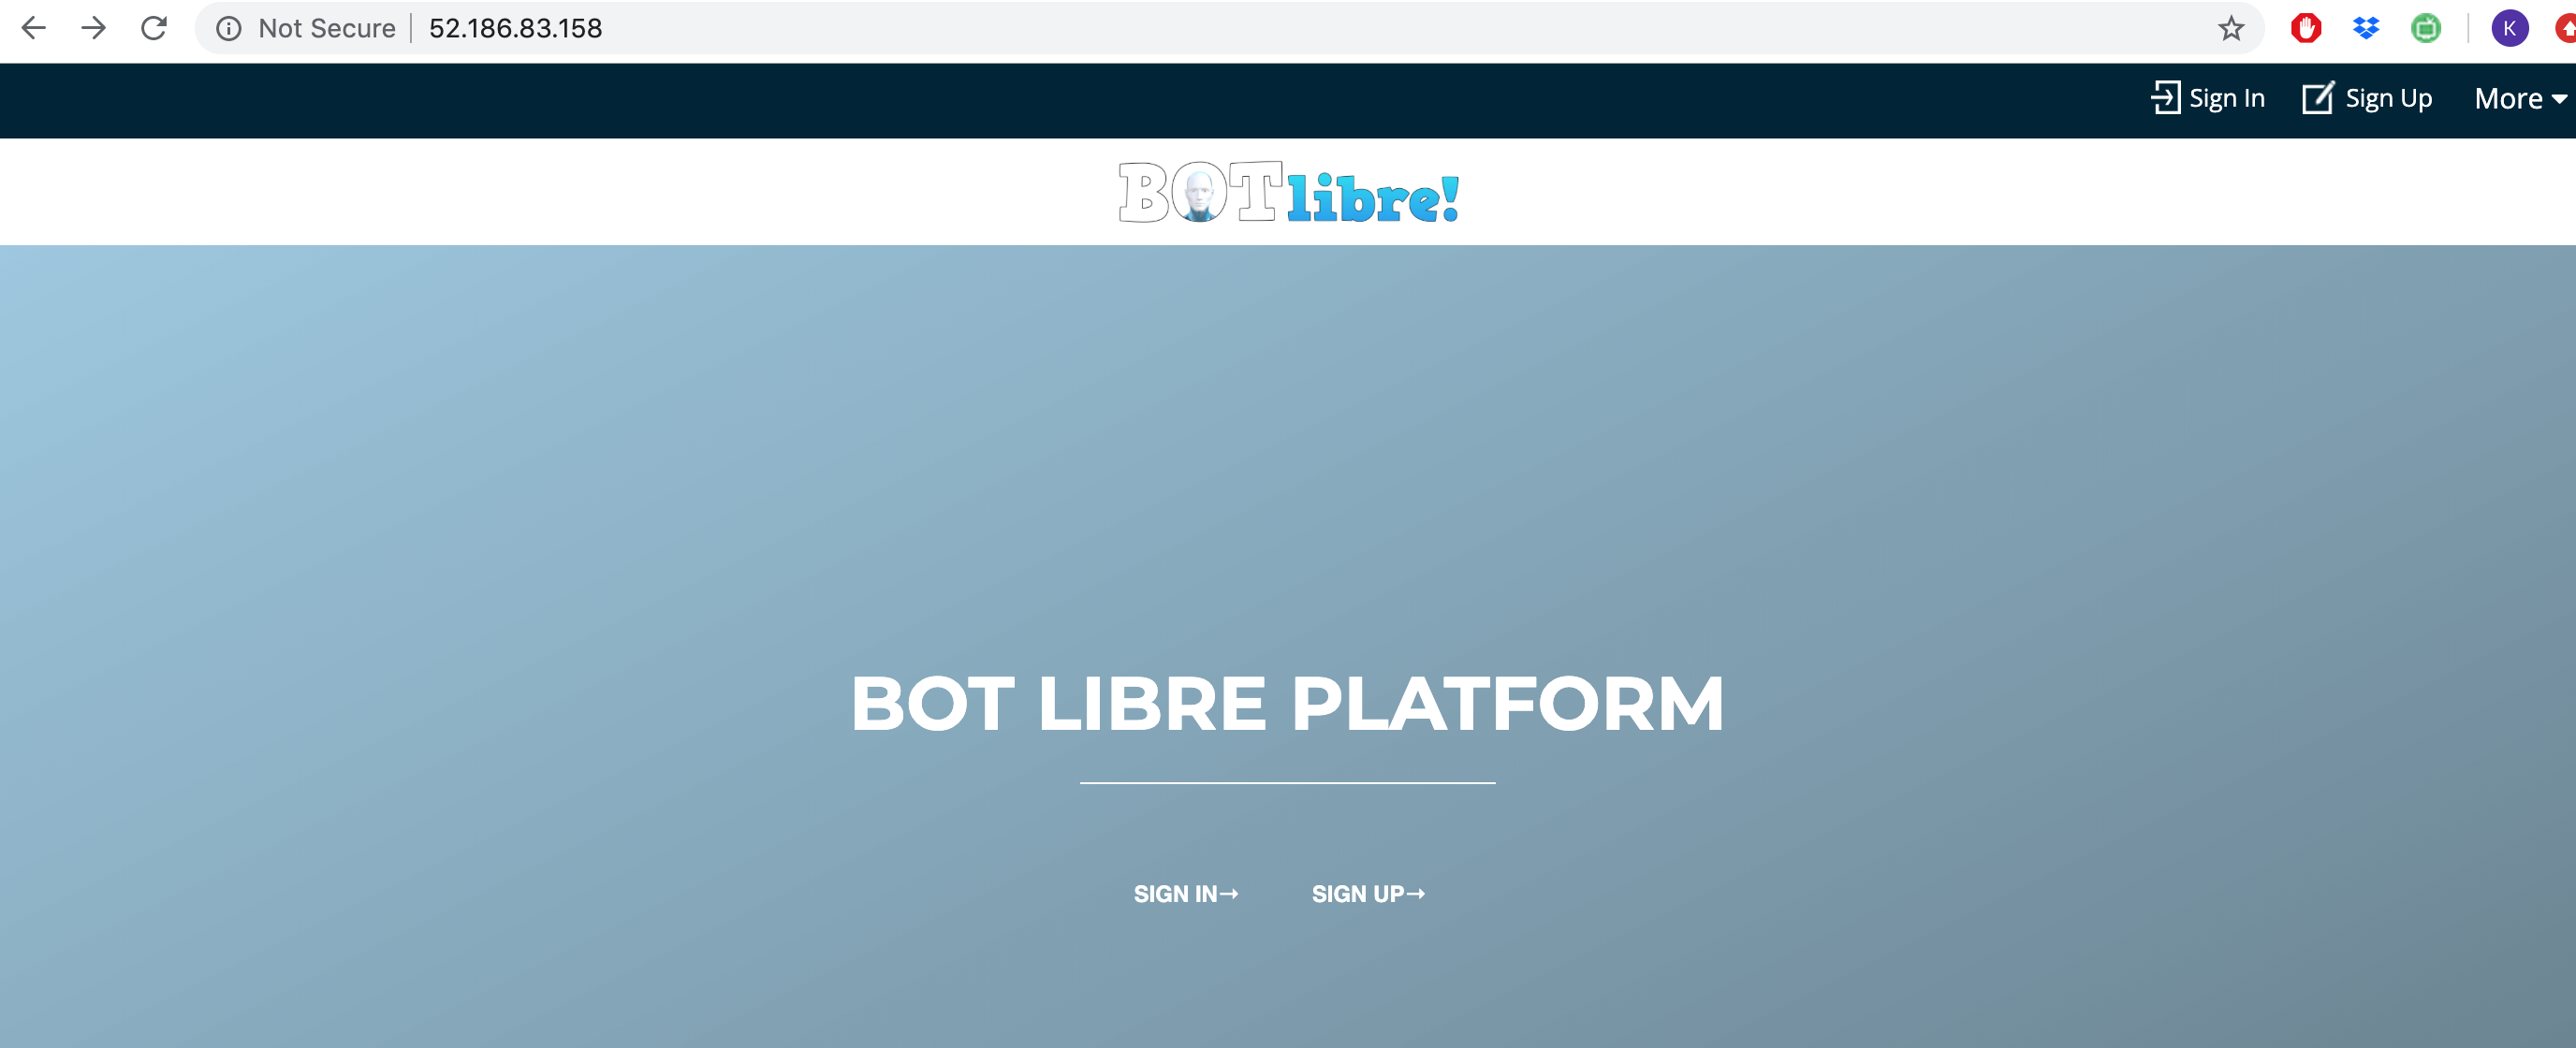
Then you may refer to the generic BotLibre install guide to login as admin user (default password is password), and create workspace, create bot, configure bot and train bot.

