Pages

Monday, February 28, 2022

How to create your own deep learning neural network for sentiment text classification without any programming

The Bot Libre platform is not just a bot platform, but also a platform for artificial intelligence and deep learning. With Bot Libre you can create your own deep learning neural network for text classification, text generation, image recognition, audio and speech recognition, object detection, games, prediction, data analysis, and more.

You may think that creating a "deep learning neural networks" sounds like a very complex thing to do, but with Bot Libre it is very simple, and requires no programming or data science experience. This article we walk you through the steps to create your own text classification network.

Step 1 - Find Sample Text

First you need to decide what types of text you want your network to classify. You can train a network to recognize and classify any type of text, as long as you have some sample text files. The more sample text files the better, but around 30 is normally enough for a basic network.

For this article, we will train a network to classify the sentiment of a text file or fragment. We could train it to recognize many different emotions, but for the sake of simplicity we will train the network to classify text as just "good" or "bad".

First you need to find some sample text files. You can create your own text data, or download an existing dataset. Here is an existing labeled text data for movie review that classify as good or bad. https://ai.stanford.edu/~amaas/data/sentiment/

Step 2 - Create Analytic

Next we need to create our analytic on Bot Libre.

  • Click browse analytics on Bot Libre
  • Click on New Analytic
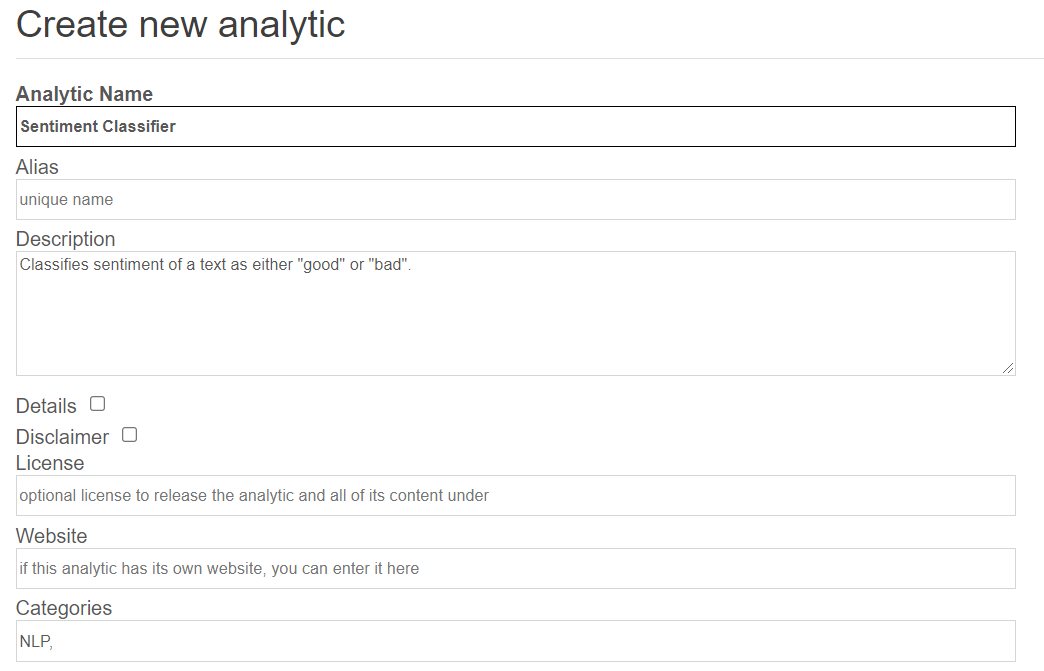
  • Enter a name and category and click "Create"

Step 3 - Configure Analytic

Next we need to configure the analytic.

  • Click on the analytic's "Admin Console" button or menu.
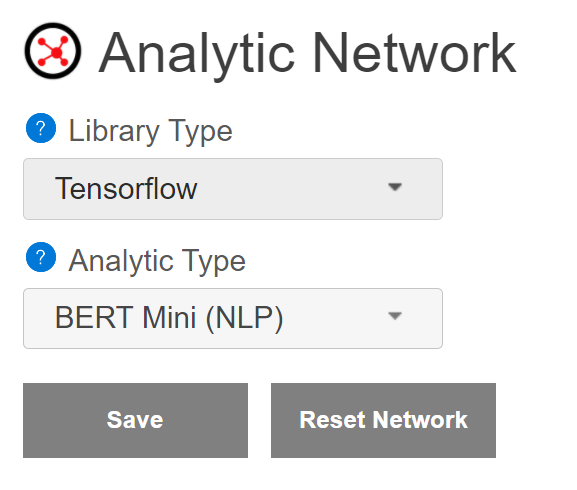
  • Click on "Analytic Network"
  • Under "Analytic Type" select "BERT Mini (NLP)"
  • It will auto-fill the other settings, click the Save button

The other analytic type settings let you create different types of networks. For text classification there are several options using the BERT model. The difference is in the size and speed, vs accuracy.

Step 4 - Upload Text Files

Next we need to upload our text files.

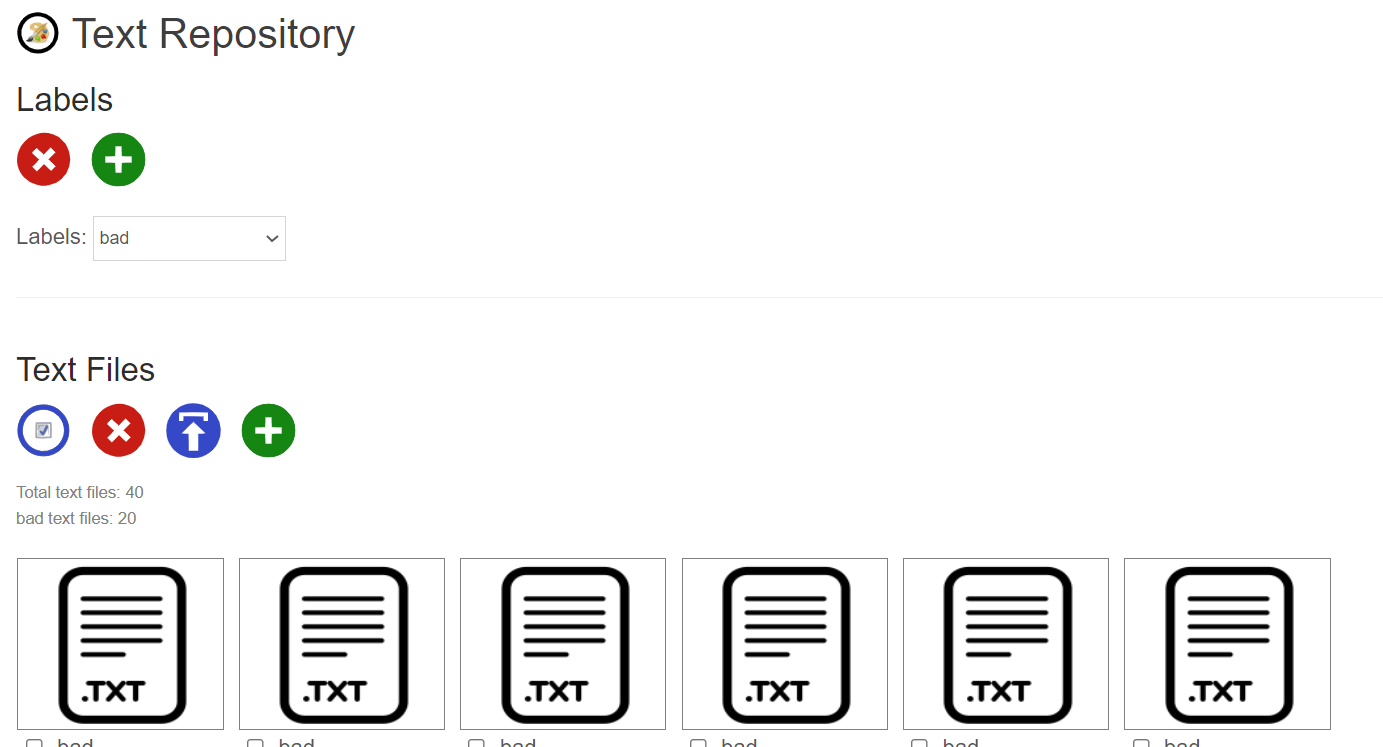
  • Click on the "DataRepository" button, menu, or link in the analytic's Admin Console
  • Click on add label (green plus), enter "good", click add again and enter "bad"
  • Select the "good" label and click the upload button, select all your "good" text files.
  • Select the "bad" label and click the upload button, select all your "bad" text files

Step 5 - Train Network

Next we need to train the network.

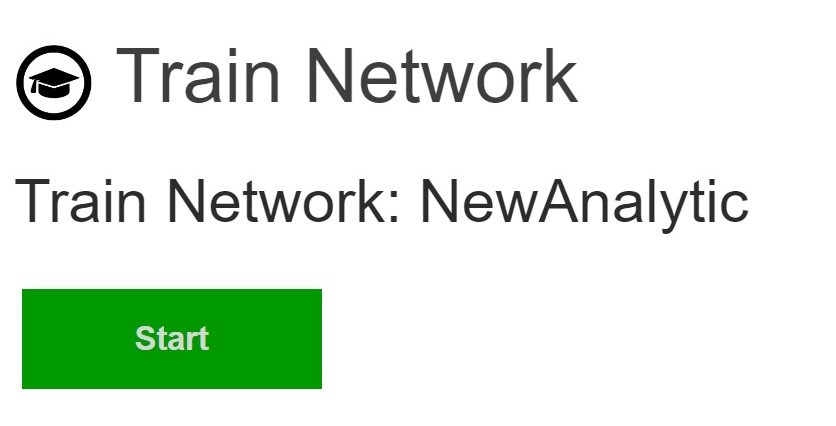
  • Click on the "Train Network" button, menu, or link in the analytic's Admin Console
  • Click on "Train", this may take a while

Step 6 - Test Network

Now you can test your network.

  • Click on the "Test Network" button from the analytic's main page
  • Upload a text file to test, or enter some text
  • It will return you if the text is has "good" or "bad" sentiment

Try testing the network with text files that you did not train it with. If it gives you the wrong result, then add the text file to your train set and train your network again.

Your Done

You can now access your analytic from Bot Libre's website and share it with your friends. You can also access your analytic through the Bot Libre web API from your own website or app. You can download your network as a ".zip" file for usage with Tensorflow.

Here is the fully trained analytic, Sentiment Analysis

Bot Libre will be adding support for training more network types in the coming months. You can also train your network manually using python and Tensorflow, this is very complicated and requires some development and python experience. We can also develop a deep learning neural network for you through the Bot Libre AI development services, contact sales@botlibre.biz.

Announcing Bot Libre 9, the chatbot and artificial intelligence platform for the Metaverse

We have released Bot Libre 9!

The worlds most advanced bot platform just got better. Bot Libre 9 is a free and open source platform for chatbots and artificial intelligence for the Metaverse. Bot Libre 9 includes support for chatbots, virtual agents, virtual assistants, social media bots, gaming bots, SMS bots, IVR bots, IOT bots, game bots, live chat, animated avatars, speech, deep learning analytics, and more. Bot Libre supports bots for the web, mobile, Facebook, Instagram, Twitter, Skype, Telegram, Discord, Kik, WeChat, Slack, email, SMS, IVR, Alexa, Google Home, and new platforms are being added every month.

"The bot and artificial intelligence platform for the Metaverse".

The Metaverse is the new vision of the Internet that provides a decentralized 3D ecosystem. The Metaverse combines 3D worlds and spaces, VR, AR, AI, and crypto.

The Bot Libre platform enables influencers, gamers, and businesses to engage the Metaverse by integrating true artificial intelligence and chatbots. Bot Libre bots can interact with users and navigate 3D spaces, Bot Libre provides an extensive API, integrations, and SDKs for popular 3D platforms.

"Bot are the new apps".

Chat and chatbots are the new application paradigm that is replacing mobile and web as the new leading method of engaging your customers and users. Chat lets you engage your customers everywhere, on web, mobile, social media, phone, and on the Metaverse.

Bot Libre lets anyone create a bot for the web, mobile, social media, phone, and the Internet of things. Connect your bot to Twitter, Facebook, Instagram, Telegram, Discord, Skype, Kik, Slack, WeChat, email, SMS, IVR, Alexa, Google Home, and more.

Bot Libre 9 supports rich HTML responses including buttons, links, choices, images, video, and audio. Bot Libre supports HTML responses on the web, mobile, and automatically maps HTML to social media platforms.

Bot Libre bots can be trained using natural language, chat logs, response lists, Twitter feeds, AIML, and scripting. Responses are automatically matched using a heuristic artificial intelligence algorithm and does not require any programming. Responses can also use keywords, topics, required words, labels, repeats, and other meta data.

Bot Libre 9 supports programming and scripting your bot using AIML 2, and Self. Self is our own dialect of JavaScript. Self is an object oriented scripting language, and integrated with an object database. Self extends JavaScript to provide support for natural language processing, state machines, object persistence, and includes a class library for accessing web services and utilities. Self also supports all AIML 2 operations, and some aspects of ChatScript patterns.

Bot Libre 9 is more than just bots, but a complete artificial intelligence platform. Bot Libre lets you create deep learning analytics for image recognition, speech and audio recognition, object detection, text classification, text generation, prediction and data analysis. You can create and train a deep learning analytic without any programming, just by uploading images, text, or other data. You can then access your analytics through our web API and mobile SDK, or from your bot.

New features in Bot Libre 9.0 since 8.0 include:

Create your own free account and bot today on botlibre.com,
or let us build your bot for you on our commercial service Bot Libre for Business.
or download our open source platform to run on-premise on your own server

Thursday, February 24, 2022

How to Connect a Bot to Discord

Create your own Discord Bot Application
Before connecting your bot to Discord, you need to create a Discord Application first. If you already have your Discord Application, you can skip the first and second steps.

Step 1: Create Application
Go to Discord Developer Portal: https://discord.com/developers/applications, click the "New Application" button at top right to create a new Application.
 
 
Step 2: Complete General Info
Now you have created your Discord Application. You can give your Bot App an Icon, change its name and complete its description under General Information tab.


Step 3: Create Bot and Obtain Bot Token
 
Click "Bot" tab at left side of the screen, it will you to your bot page.
If it's your first Bot, you can click "Add Bot" button at right side of the screen.


Once you have your Bot, you need to copy the token. This token is required when you connect your BotLibre bot to Discord Application. Keep this token secret. If you leak the token accidentally, you can click the "Regenerate" button to create a new token.


Connect your BotLibre Bot to Discord Application

To connect your Bot Libre bot to your Discord bot, go to your bot's Admin page. Make sure you login and go to your bot's page first. In your bot's Admin Console click on the Discord link.


It's very easy, just paste your Discord Bot Token, then click "Connect" to connect your bot.


If successful, it will show you Discord management section. You can disconnect, reconnect to the Discord App, and change Group Reply mode here.


Add your Bot to a Discord Server

First, you need to click "OAth2" tab and then click "URL Generator". In the Scopes section, you need to select "bot".


Scroll down to Bot Permissions section, you need to give your bot permissions. Based on the type and function of the bot you want to build, you can give your bot different permissions.


Scroll down to bottom, you will see your bot URL.


Open this URL in a browser, select the server you want to add to.


That's it, now your bot is successfully added to your Discord server. If you encountered any issues or would like our help setting up your bot please email us at support@botlibre.com or upgrade to our Platinum service and we can build your bot for you.

How to Connect a Bot to Instagram

Keeping up with social media and keeping your online community engaged can be a time consuming task. Through Bot Libre you can now automate your Instagram presence with your own Instagram bot. Any Bot Libre bot can be connected to an Instagram account via a Facebook page account. The bot will reply to your users questions in real-time using the responses of script you have trained your bot with.

Connecting a bot to Instagram a bit of a process, as Facebook requires a lot of permissions and validation to be setup to allow a bot on their platform. This "how to" give you a step by step process to connecting your bot to Instagram.

Step 1 - Create a Facebook Page for your bot.

After you have logged in to your Facebook account, you can create a page by clicking on "Create" on the top right menu and selecting "Page".

Enter a page name, category and description, and click on "Create Page". Then, fill out the details of your page: 

Step 2 - Create an Instagram Business/Professional Account

Use a mobile device to create an instagram account. Then, follow the steps as below:

Go to your account in Instagram and click "Edit Profile" and fill out your details if you haven't done already. Then, click on the three horizontal bars on the right to go to settings:

Then, go to settings and tap on account:

Scroll below and tap on "Switch to Professional Account":

Then click on continue and select the type of business you operate, and click done. If your account is set to private, you may receive a popup like this:

Click on Ok to convert your account to public, and that should complete the process of creating a Instagram Professional account.

Step 3 - Connect your Instagram Business/Professional Account to a Facebook Page

Instagram accounts are managed through Facebook Pages, so you must connect your Facebook page to your Instagram account. Go to your Facebook Page, and click on settings on the left menu:

Then click on the Instagram tab from the left menu bar again, and click on Connect Account from the Connect Instagram page:

Now click on continue with messaging enabled:

Now it will take you to Instagram login page. Enter your instagram username and password, or if already logged in, click continue this will connect your Instagram account to your Facebook page.

Step 4 - Create a Facebook App for your Bot

Go to http://developers.facebook.com and click on 'My apps':

From there, click on "Create App", leading you to this page:

From here select Business and click on Next:

Add the details for your business and click on Create App. Then, go to the app dashboard:

From here, scroll below to add the following products to your app: Facebook Login, Instagram Graph API, Messenger, Webhooks:

Now click on Settings for the Facebook Login Feature:

From here, make sure "Client OAuth Login", "Web OAuth Login", "Embedded Browser OAuth Login" are set to Yes. For the Valid Oauth Redirect URIs enter the following values: "https://www.botlibre.com/instagram" and "https://www.botlibre.com/facebook" followed by spaces, and click on Save Settings.

Next, click on Settings > Basic from the left menu. You should see a page similar to this:

From here, copy your App ID and click on Show to show your App Secret, and copy it. Save your App ID and App Secret somewhere safe.

Enter the app domain "www.botlibre.com" and for the Privacy Policy and Terms of Service, add the links to your website containing those pages. You might need to create a Privacy policy and Terms of Service if you do not have one already.

Step 5 - Get a Page Access Token for your Facebook page connected with the Instagram Account

From the previous step, you should have set up Messenger for your Facebook App. Now from the left menu, click on Messenger > Instagram settings:

In the Instagram Messaging section, your page should be added in the section for "Access Tokens". If not, you can click on "Add or Remove Pages" and select the page you want to connect with your Instagram Account.

Then, click on "I understand", and then "show" to show your token: 

Click on copy to copy your token. You will need this token later on, and you can see this token only while generating it so you will need to save it somewhere safe.

Step 6 - Create a bot

Next, you will need to create a bot to connect with your Facebook Page and App. You can follow the instructions here to create your bot: How to create your own chat bot in 10 clicks

Step 7 - Connect bot with Instagram

From the Bot Libre website, browse to your bot. Go to the Admin Console by clicking on the gear icon at the bottom. Then click on Instagram Tab. This will bring you to this page:

You should have you Facebook App ID, App Secret and the Facebook Page Access Token from the earlier steps. Enter each of these in the appropriate fields and click on Connect. You do not need to enter the Username or Access Token fields, as these will be filled automatically. Copy and save the Webhook Callback URL as you will need this later.

Grant all the necessary permissions and select the page you want to connect with the bot. If your connection is successful, you should be able to scroll down and set the properties:

Step 8 - Set up a Webhook URL with Instagram for real time messages

From the Instagram bot settings page, scroll up and copy the Webhook Callback URL. Then, go to your Facebook App page and click on Messenger > Instagram Settings on the left menu. Then, scroll below to the webhooks section and click on "Add Callback URL":

In the Callback URL paste the Webhook Callback URL you copied from the bot page earlier, and in the Verify token, place "token", and click on "Verify and Save". If successful, the webhook will be added to your Facebook app: 

From here, click on "Edit Subscriptions" and check the following boxes: "messages", "messaging_postbacks", "message_reactions", "messaging_seen", "messaging_handover", and click Save:


The webhook should now be added to your bot and ready to received and send messages.

Step 9 - Approval by Facebook

At this point, you or any any authorized user who has a role of "App Developer" or "Owner" in your Facebook App and has a Facebook Account connected to their Instagram account should be able to send messages to your bot's Instagram Account with , and your bot will respond.

For regular Instagram users who do not have a role in your app to  be able to send and receive messages with your bot, you will need to have your Facebook App approved by Facebook.

Return to the Messenger Settings page on the Facebook Developer website and scroll to the 'App Review section.

Each of these permissions will need advanced access and must be reviewed by Facebook in order for your Instagram bot to interact with the general public. To request advanced access, click on "Request Advanced Access" on all of these permissions. To get verified, your app must comply with the Facebook terms and conditions. You might also need to verify your identity as either and individual or a business from the Settings > Basic Tab. Click on Start Verification to start the verification process. 

If you got this far, congratulations, you have now connected your bot to Instagram. Now you can train your bot's responses and review its conversations from its "Training & Chat Logs" page in its Admin Console. If you encountered any issues, or would like our help setting up your bot please email us at support@botlibre.com or upgrade to our Platinum service and we can build your bot for you.