The Bot Libre platform is not just a bot platform, but also a platform for artificial intelligence and deep learning. With Bot Libre you can create your own deep learning neural network for text classification, text generation, image recognition, audio and speech recognition, object detection, games, prediction, data analysis, and more.
You may think that creating a "deep learning neural networks" sounds like a very complex thing to do, but with Bot Libre it is very simple, and requires no programming or data science experience. This article we walk you through the steps to create your own text classification network.
Step 1 - Find Sample Text
First you need to decide what types of text you want your network to classify. You can train a network to recognize and classify any type of text, as long as you have some sample text files. The more sample text files the better, but around 30 is normally enough for a basic network.
For this article, we will train a network to classify the sentiment of a text file or fragment. We could train it to recognize many different emotions, but for the sake of simplicity we will train the network to classify text as just "good" or "bad".
First you need to find some sample text files. You can create your own text data, or download an existing dataset. Here is an existing labeled text data for movie review that classify as good or bad. https://ai.stanford.edu/~amaas/data/sentiment/
Step 2 - Create Analytic
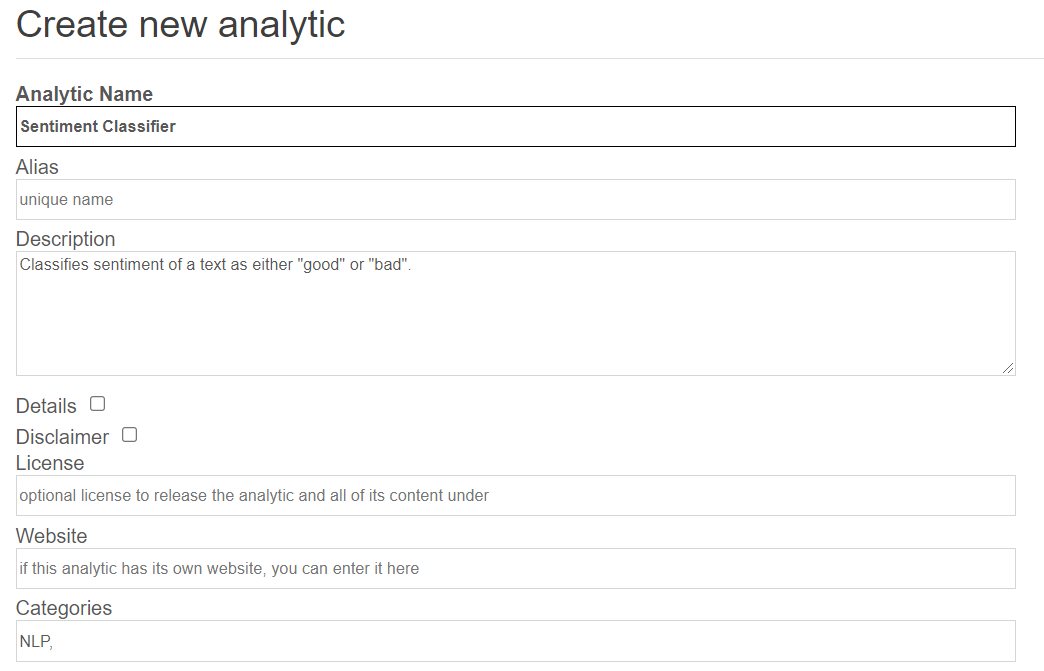
Next we need to create our analytic on Bot Libre.
- Click browse analytics on Bot Libre
- Click on New Analytic
- Enter a name and category and click "Create"

Step 3 - Configure Analytic
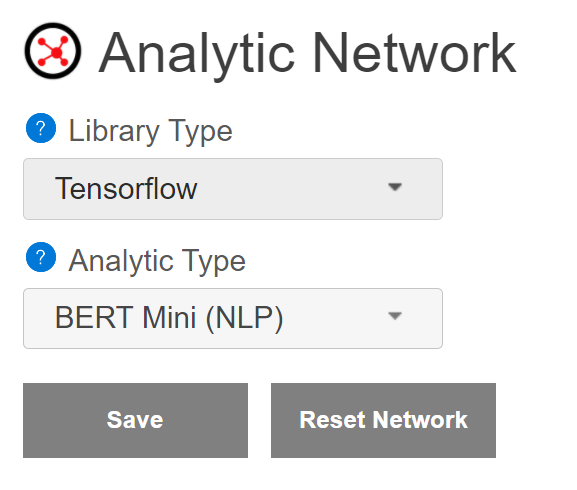
Next we need to configure the analytic.
- Click on the analytic's "Admin Console" button or menu.
- Click on "Analytic Network"
- Under "Analytic Type" select "BERT Mini (NLP)"
- It will auto-fill the other settings, click the Save button
The other analytic type settings let you create different types of networks. For text classification there are several options using the BERT model. The difference is in the size and speed, vs accuracy.

Step 4 - Upload Text Files
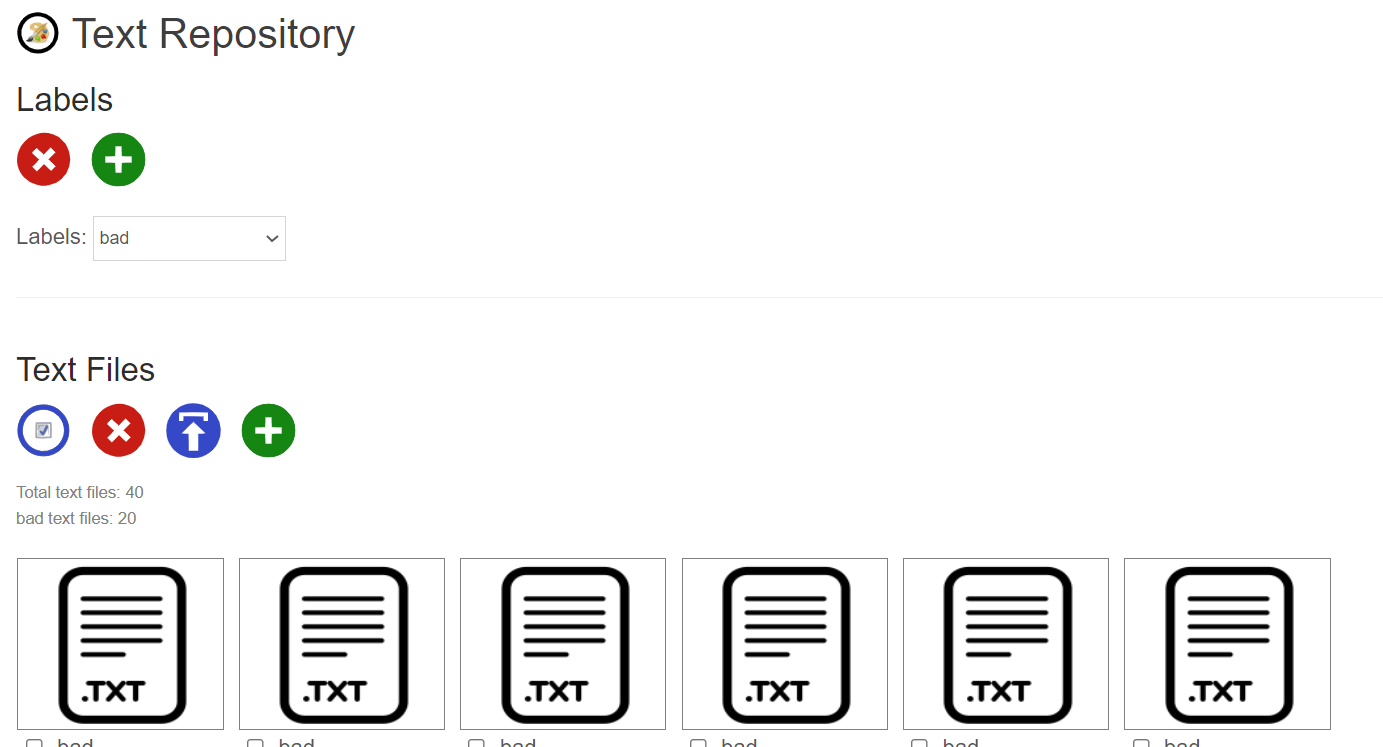
Next we need to upload our text files.
- Click on the "DataRepository" button, menu, or link in the analytic's Admin Console
- Click on add label (green plus), enter "good", click add again and enter "bad"
- Select the "good" label and click the upload button, select all your "good" text files.
- Select the "bad" label and click the upload button, select all your "bad" text files

Step 5 - Train Network
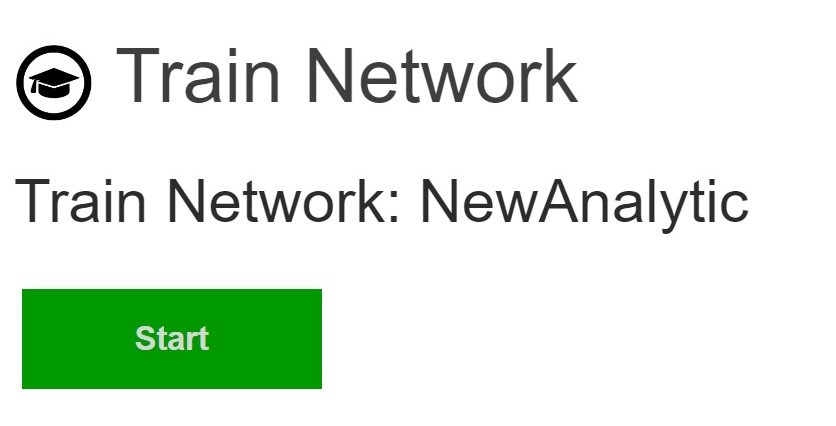
Next we need to train the network.
- Click on the "Train Network" button, menu, or link in the analytic's Admin Console
- Click on "Train", this may take a while

Step 6 - Test Network
Now you can test your network.
- Click on the "Test Network" button from the analytic's main page
- Upload a text file to test, or enter some text
- It will return you if the text is has "good" or "bad" sentiment
Try testing the network with text files that you did not train it with. If it gives you the wrong result, then add the text file to your train set and train your network again.
Your Done
You can now access your analytic from Bot Libre's website and share it with your friends. You can also access your analytic through the Bot Libre web API from your own website or app. You can download your network as a ".zip" file for usage with Tensorflow.
Here is the fully trained analytic, Sentiment Analysis
Bot Libre will be adding support for training more network types in the coming months. You can also train your network manually using python and Tensorflow, this is very complicated and requires some development and python experience. We can also develop a deep learning neural network for you through the Bot Libre AI development services, contact sales@botlibre.biz.

No comments:
Post a Comment